
I’ve not really written a review for anything before; I just tend to give whatever it is a star rating and go about my day. But I need to keep posting to my blog regularly if I want people to read it, and I was a bit stuck for inspiration, to be honest. So here we are.
If you want to skip the prologue, scroll down now to the heading “First Impressions”. If you don’t, then just carry on as you were; it’s only a few short paragraphs.
I bought this bead reamer because I love a gadget, and I use beads in pretty much every piece of jewellery I make. But also, because I’m still in the fine tuning stages of Kit Prep, and my old one is quite worn down now.

When I make jewellery, I don’t mind all that much if it’s a bit of a squeeze to get a bead through the needle and onto the strand. But I do mind when it frays the thread or I poke myself with the needle, and I obviously wouldn’t want that to happen to anyone else. So the solution is to make the hole bigger. Feel free to make your own jokes here.
And so comes the need for a bead reamer. Basically a long, thin, round tapered file for, well, filing away at the inside of a bead. And this one is battery powered, because why not? Actually, there is a point: it’s to get through the process more quickly.
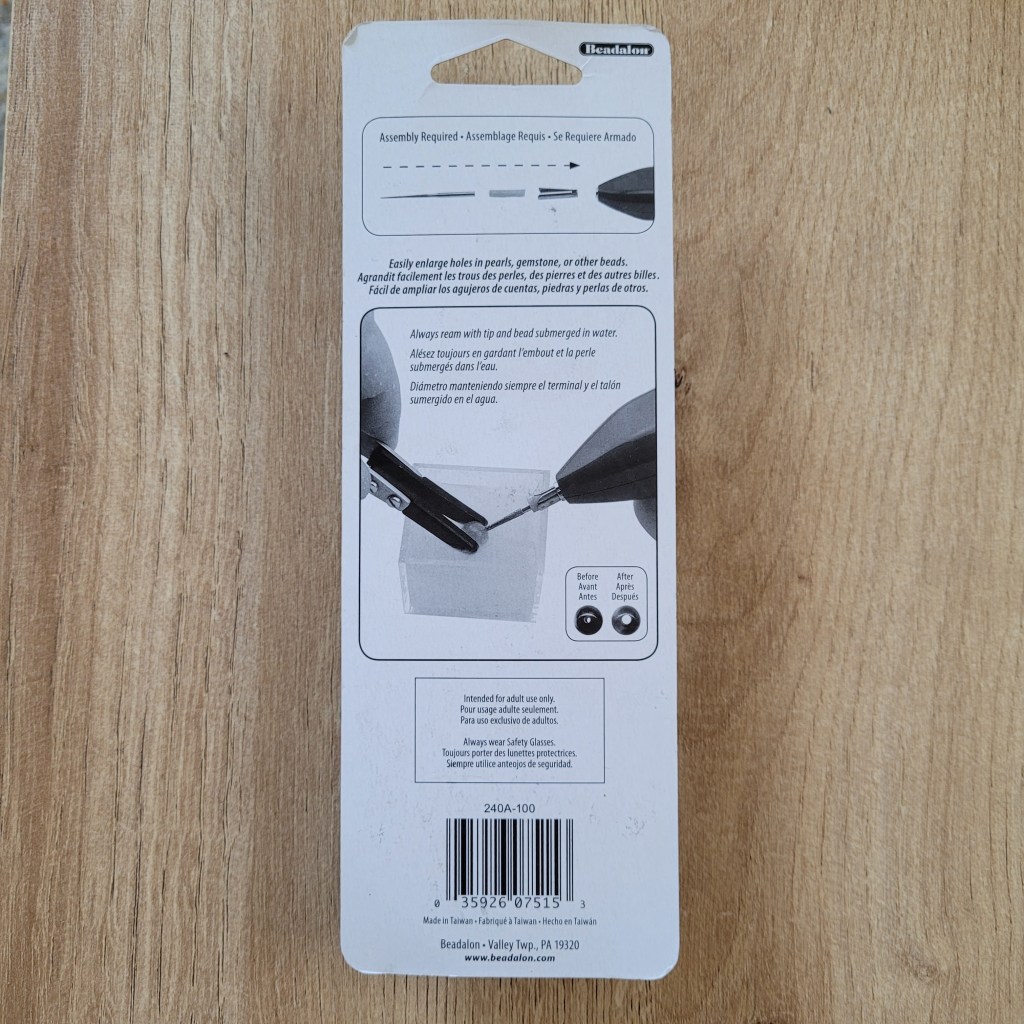
BEADALON® Bead Reamer Battery Operated
Price: £12.99 on amazon.co.uk (RRP £19.99)

First Impressions
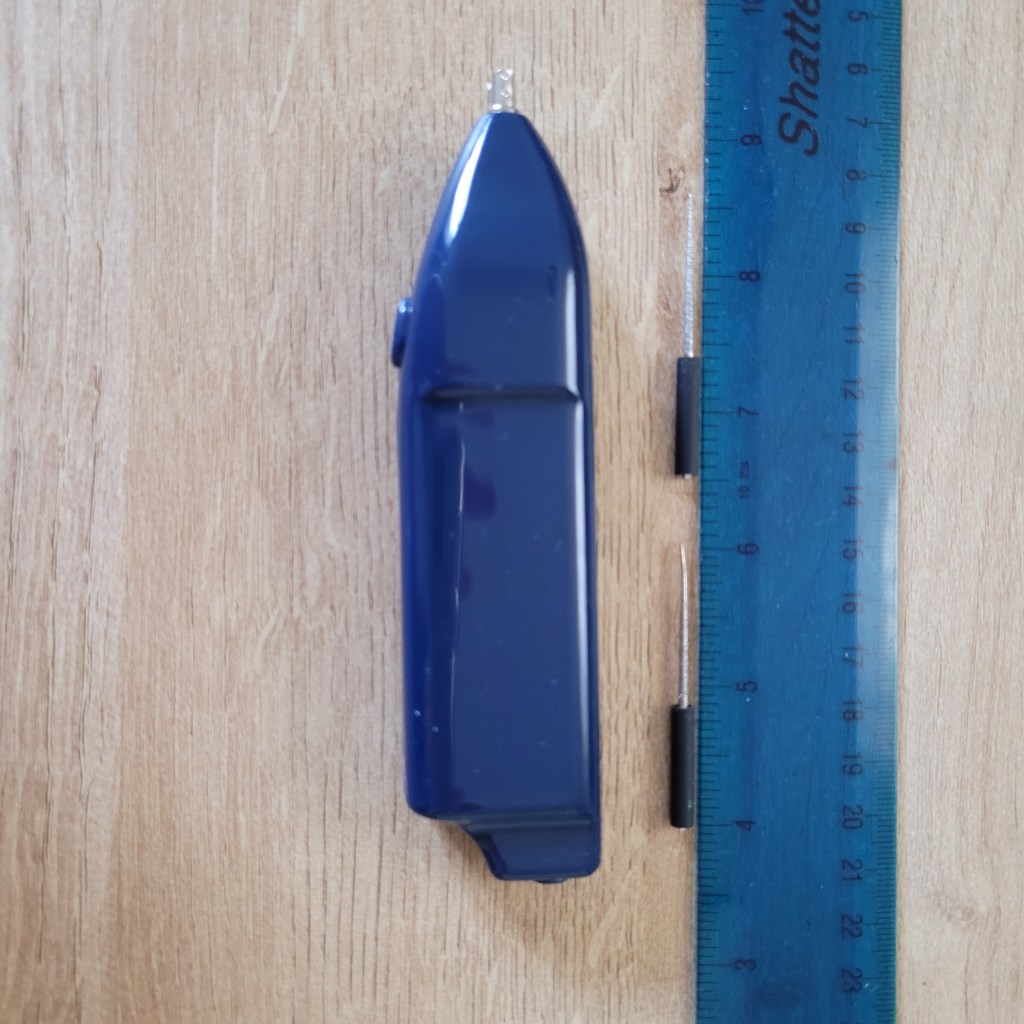
It looks alright: plain dark blue outer casing. Plastic. Feels pretty solid and sturdy, and there’s a nice grip to it; it’s just fine. I wasn’t expecting a bead reamer to wow me with its design anyway.
It’s got a nice weight to it, both before and after I put the batteries in (it needs x2 AA batteries), but there wasn’t a noticeable difference either way.
The two tips it is supplied with are the same length (about an inch or so), but one looks to be slightly narrower than the other. They feel quite coarse and the ends are pretty pointy, so they’d probably be quite effective even when the batteries run out.
Using The Thing
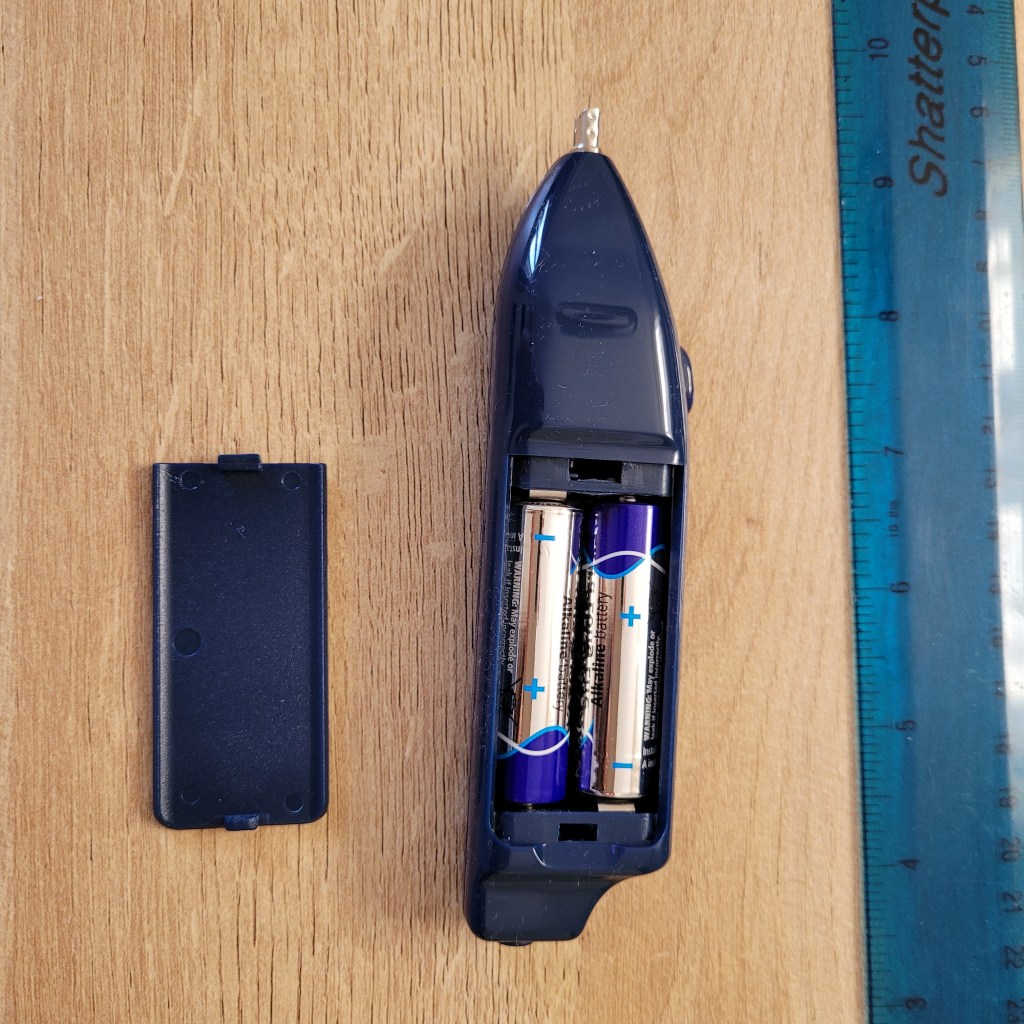
Instructions on how to put it all together and get it running are all printed on the back of the packaging, but really it’s so easy and intuitive it probably doesn’t need to tell you. Inserting the batteries is maybe the most difficult thing, and that’s simple enough; just pull up the little lid thingy, pop the batteries in, put the lid back on and you’re good to go. The lid thingy closes with a nice little “click” too. I always appreciate that.
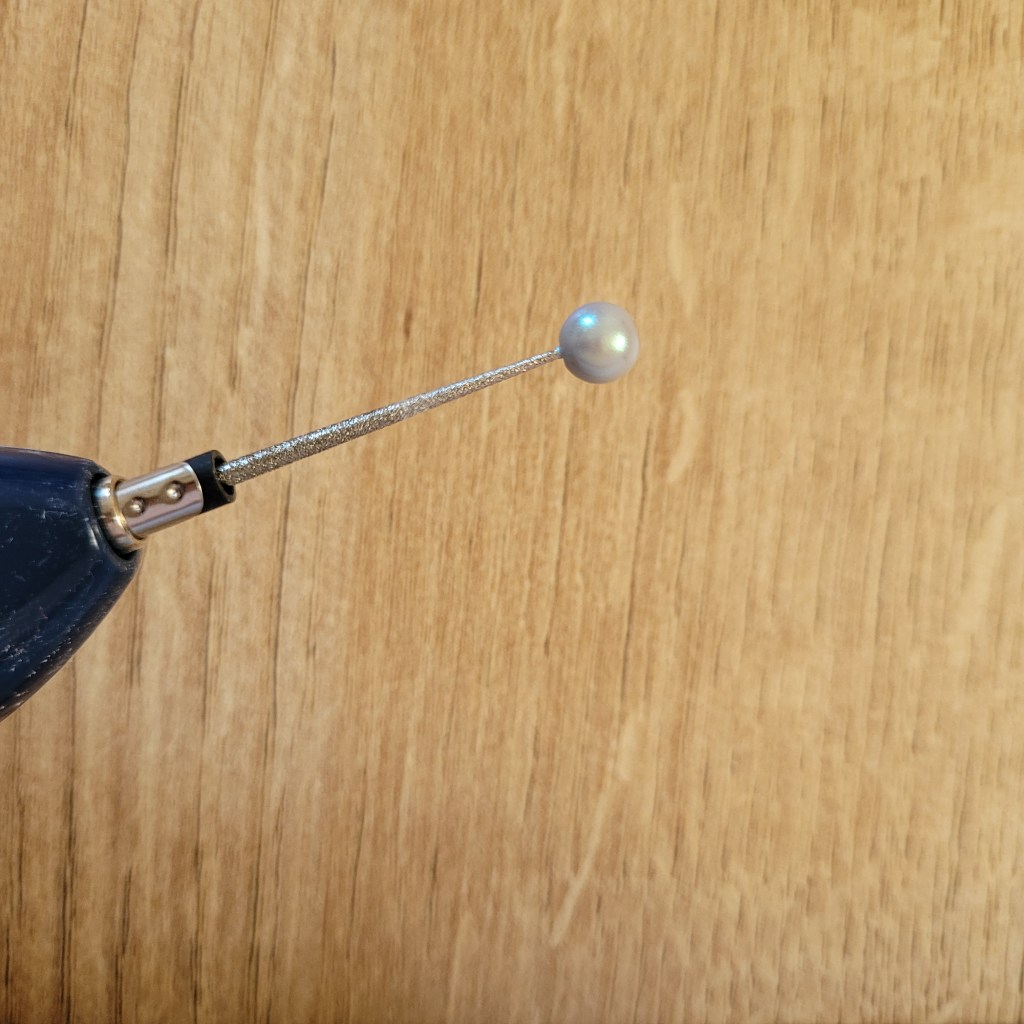
I’d sorted some spare beads of different sizes and materials (glass; semi-precious stones; my favourite synthetic pearls by Preciosa I’m often banging on about) to see what it works best with.
The On/Off button is one of those press-and-hold-to-use types, where to stop it you just let go, so that’s simple and easy enough to use.

Sound-wise, on a scale of “Cat Purring” to “Wasp Flying Next To My Ear”, I’d say it’s somewhere in the middle, but closer to the wasp one. It sounds more or less like a phone vibrating, so it’s however irritating you find that, really. But it is quiet and I didn’t have to listen to it for long – beads are only small – and I generally wear earbuds all the time anyway, so I wouldn’t usually pay attention. Off-topic, but podcast recommendations are much appreciated if you have any; I like true crime as much as the next person, but I really should find something else to listen to.
**UPDATED 15 March ’22** I’m sitting here, ears undefended while my earbuds charge (the hardship). And I have to say, having used the reamer for about an hour now, it’s really irritating. And loud. I used new batteries this time. So yeah, if you need to use one of these, it’s definitely worth getting something to stick in/over your ears first.
One thing I noticed is it does kick out a fair bit of dust, which is to be expected. Especially from the glass and semi-precious beads. But because it’s electrical, I don’t think it would be advisable to dip the tip in water before running it into the bead hole, as you can with a standard bead reamer. I had a quick Google anyway, but I couldn’t see anything that said it’s water-resistant/proof, so I will assume it isn’t. I just wiped a damp cloth over the tips once I’d removed them from the… unit(?) and rinsed all the beads in water afterwards, so they shouldn’t have any dust left on them.
As I won’t be treating it like it’s waterproof, I found it best to run the reamer through the holes in short bursts, to reduce any chances of cracking from overheating. Though I didn’t notice the tip or the unit itself getting particularly warm anyway.


All of the beads coped well with my attempts to reduce their all-over surface area, though I wasn’t exactly going out of my way to mishandle them. The neon apatite bead was the most difficult, though. I barely got the reamer tip even halfway in from either side, even after trying for a few minutes. It also got a bit scuffed and marked because it was the first bead I tried the reamer out on, and wasn’t quite used to holding it and hadn’t quite put the right amount of light pressure on the On/Off button. I would say that – thankfully – it worked best on the synthetic pearl, filing away at the crystal interior far more easily and quickly than the other beads. I also had some success with the sodalite bead too. Now I think about it, it might be because they were the two most spherical beads, so it was easier to get a grip on them. I probably should’ve made sure the others were similar sizes and shapes too. So that’s a fault on my part.
Thoughts
I like it. Glad I bought it, but I’m pleased I didn’t have to pay more for it. I can tell it will last a good while, which is a plus as I will be getting a lot of use out of this.
Because it is battery powered, and therefore rotates many, many times faster than I could do by hand, I’m also wondering how else I could use it. For example, how effective it would be for etching into things. I know that the synthetic pearls I tested the reamer on are supposed to be scratch resistant (one advantage they have over natural pearls), and though I did accidentally slip a few times on my first couple of gos, the beads didn’t appear to have any scuff marks or scratches. But, as I mentioned, my neon apatite didn’t make it through this test completely unscathed.
Rating Out Of 5?
I’d give it a 4. It’s great for what I need, but I don’t think it’s worth the £19.99 RRP, so if you need one and can get it for less than that like I did, pick one up.
That’s all from me for now. I still have some more fine-tuning and R&D to be getting on with before my kits are ready for you, but I am aiming to have something ready in time for Mother’s Day (UK Mother’s Day, that is. 27 March isn’t that far away!). In the meantime, I want to say thanks so much for popping in and having a read. Have a lovely rest of your day!
If you’d like to see more from me, there are other posts on the blog to read if you haven’t already. Plus, you can find me on Instagram, Twitter, and Facebook, and of course, you can treat yourself and visit my Shop!
