I have new stuff I want to add to my shop, including some nice little accessories and storage solutions! But my old stock is in the way!
So I’m having a clear out. Which means it’s SALE TIME! Nearly everything in my shop is currently 50% off its normal price and I’m keeping the sale going on those items until they’re all gone!
Not only that, but there’s also a nice 25% off the price of the made-to-order items I’ll be keeping restocked after all the others have gone. This is only for a limited time of 14 days though, just FYI.
I realise, looking back at my previous blog post, it does seem a bit strange to almost immediately reduce the prices on several lovely pieces of handcrafted jewellery, but I need stock space and who doesn’t love a bargain? So it’s win/win, really.
Right, that’s all for now. Thanks so much for popping in and having a read. Have a lovely rest of your day!
If you’d like to see more from me, you can find me on Instagram and Twitter, and of course, you can support me and treat yourself – or somebody else important – in my Shop, where delivery is free, and the Sale has only just started!
Have you ever heard of ‘The Lipstick Effect’? It’s a theory in psychology that, in the face of a financial crisis, customers are more willing to buy relatively inexpensive ‘unnecessities’, like a lipstick, as opposed to pricier items like shoes. And I will admit that it had me thinking about making some lower-priced items to list in my shop for this purpose.
However, I don’t want to add pieces of jewellery to my shop just for the sake of it. I’m happy to make jewellery just for the sake of it – it’s something I generally and genuinely enjoy – but that’s not really what I want my shop to be. I want it to be somewhere you bought something you love, for someone you love, that says something about the connection you share.
A lot of customers buy a piece of jewellery from my shop as a gift for a loved one – for anniversaries, birthdays, Valentine’s Day, Mother’s Day, Christmas, etc. – and as an online shopper myself, I know how nice it is to add a little extra something to your basket just for you; it’s like a reward for finding just the thing you know they’ll love. Or at least for being able to check names off your gift list!
All of the jewellery I sell in my store is made by hand, by me, and as a customer I’m also aware that terms like ‘handmade’ and ‘handcrafted’ carry their own meanings and implications. If someone is looking to purchase a handmade gift for a loved one, they are likely looking for something with a certain quality that reflects the personality or taste of their… giftee? I suppose I could say ‘recipient’, but that sounds too formal, and as much as I like big words, I don’t feel like that one suits.
The pieces of jewellery I make for my shop are reflective of both the time it takes to make them, and what they are made of. It’s not just the fact that something is made of precious metal or gemstones that dictates the price.
When shopping for handmade or handcrafted items we already have that expectation that the maker has given a lot of time, care, and attention to creating that one piece, and so we would be expecting the cost to reflect that.
Having choices is often a great thing, and being able to offer choices is just as good. And I am looking forward to the time when I can offer a wider range of choices that suit a wider range of budgets in my shop.
Out of interest, if I were wave a magic wand and add something new to my shop right now, what would you like to see? More of the same? More colour? Somewhere to store your prized pieces? Or something else entirely? Let me hear your thoughts in the comments.
Right, that’s all for now. Thanks so much for popping in and having a read, and commenting if you left one. Have a lovely rest of your day!
If you’d like to see more from me, you can find me on Instagram and Twitter, and of course, you can support me and treat someone (yes, that someone can definitely be yourself) in my Shop, where delivery is free!
Running low on inspiration, but with plenty of motivation to do anything other than what I should be doing, many of my spare moments lately have been spent watching the new series of Ghosts (thank you, BBC iPlayer, for letting me put my poor impulse control to good use),and showing my kid how to play The Sims 4 (how timely, as I’ve just learned that The Sims 5 is on its way!), and it’s all been very fun. Except for when it wasn’t.
Anyway, my kid and I, we both realised that our favourite way of “playing” the game isn’t actually to play the game; creating the Sims and building the houses are the parts that we love most of all. Maybe because by the time everything is made and ready, it’s either time to do something else, or we’ve run out of steam/enthusiasm. So anyway, it’s pretty much become a design tool for us at this point.
Which has given me an idea: to recreate a piece of jewellery I like from The Sims 4. Not with any intention to profit financially from this, by the way, if anybody from EA is reading!
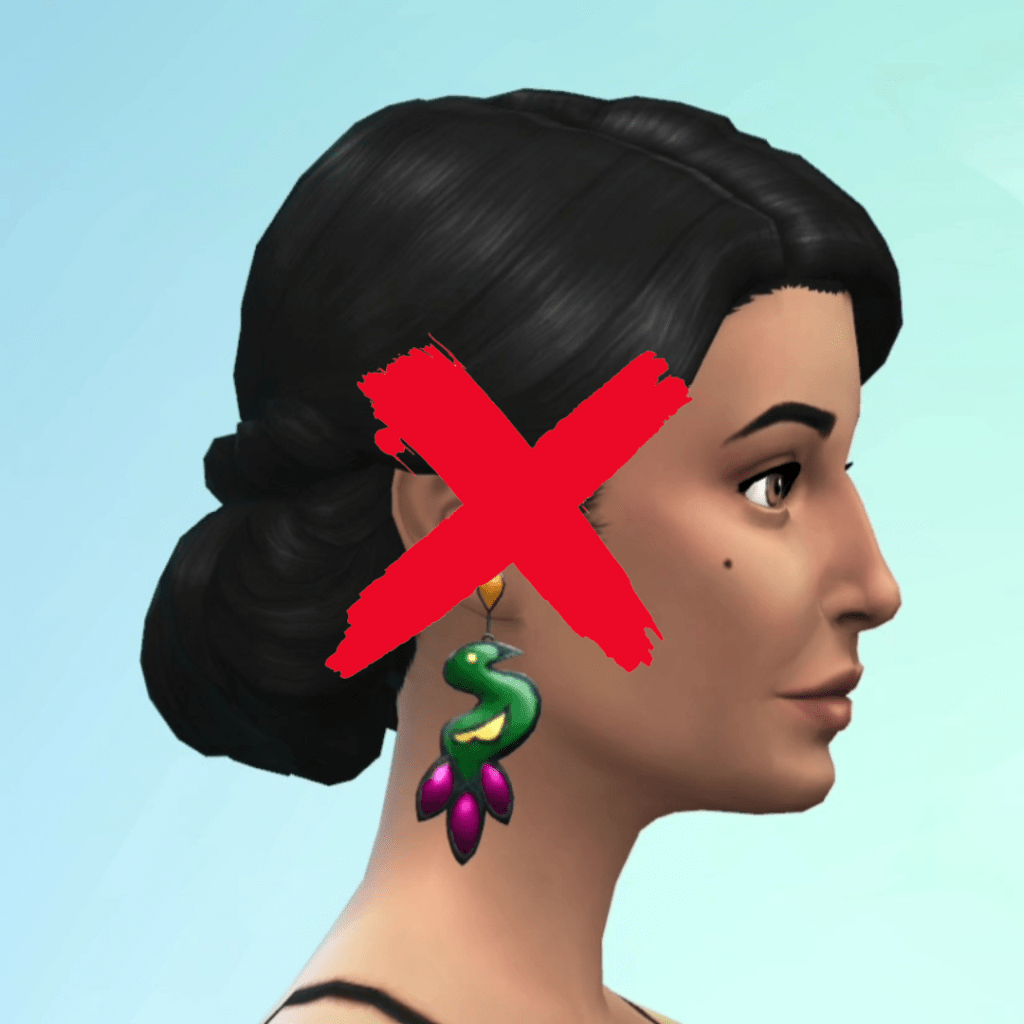
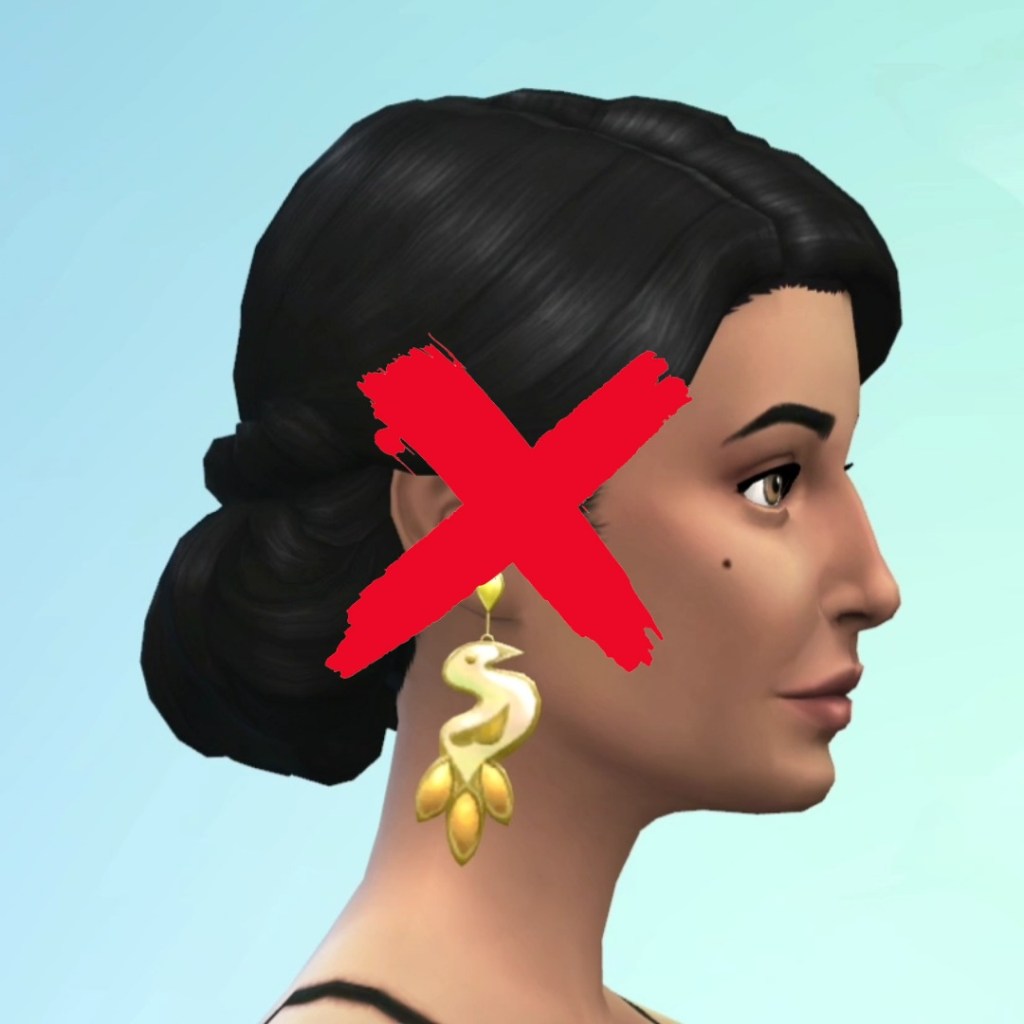
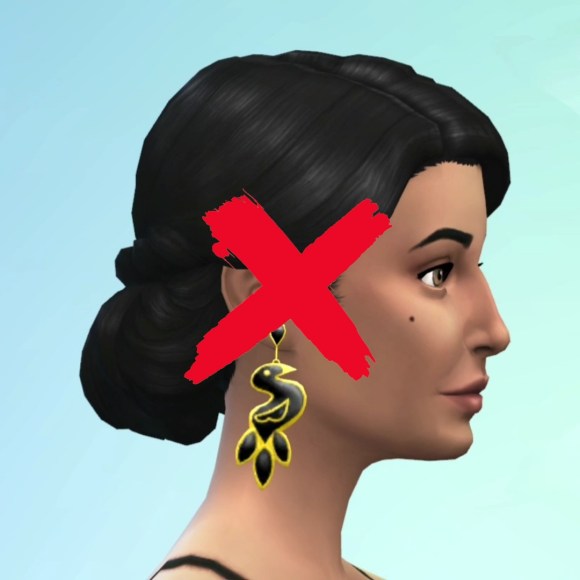
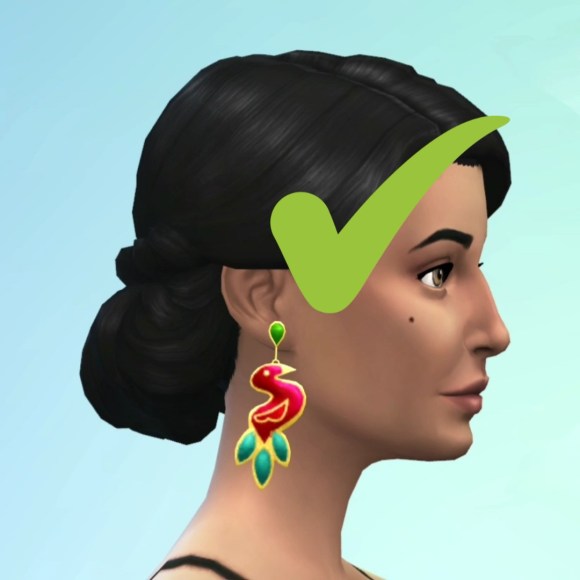
I thought I should make a pair of earrings, so I scoured through all the options and narrowed it down to these three pairs, as modelled below by the series’ newest iteration of one of its most famous characters, Bella Goth.
(side note, I don’t know when they updated the Goth family in the game, but I do know I’m not a fan of their new looks. But that’s another story for another time. And perhaps another audience. Anyway, she’s #NotMyBella)
I decided on the big birdie pair in the middle, and thought polymer clay would be a good medium for this project. It’s simple enough to work with, I can make pretty close colour matches and – perhaps most importantly – it’s lightweight, so the earrings would be comfortable to wear.
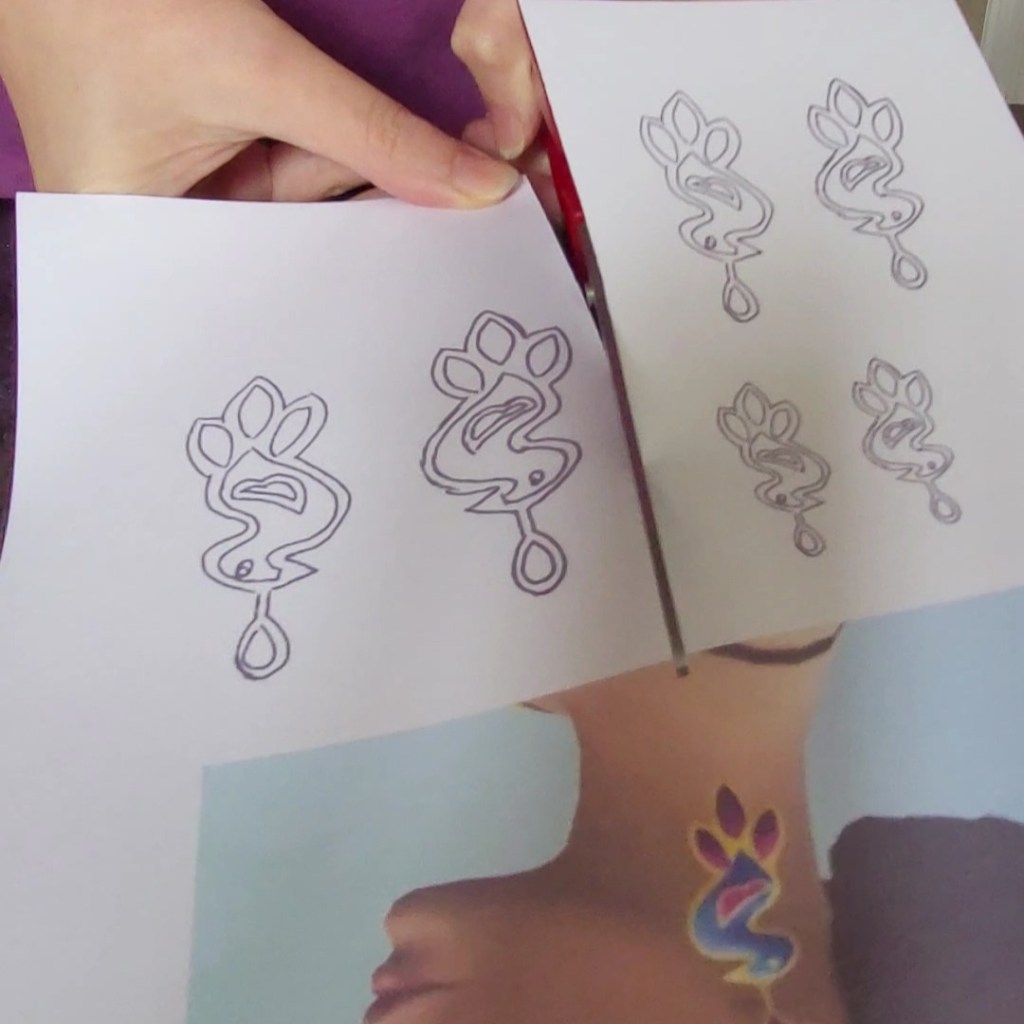
The design of these earrings needs to be the same on both sides, but as a mirror image. I was thinking of approaching this in one of two ways: make a stencil/template, or make a cane.
Using a stencil would certainly be the less time-consuming and simplest option – I’m imagining something similar to decorating a cake, which I enjoy doing (likely because I only do it once a year for my kid’s birthday) – but after watching so many polymer clay cane slicing videos online, I kind of want to try that.
In case you’re like myself who didn’t know what a polymer clay cane was until those videos showed up in my Instagram feed, they’re pretty much like a stick of rock, with a pattern or design running all the way through it.
Unable to make a decision out of only two choices, I gave it a few more seconds’ thought. And came to the conclusion that enjoying the look of polymer clay canes is one thing, but I’ve never made one before and if I can’t get the hang of it quickly, I’d soon be fighting my own waning enthusiasm for the project to get it done.
So, it was decided: stencil method. I could get ready to make my very own pair of big birdie earrings.
But wait! There was another decision to make! There are 12 different colour variations of these earrings, and I liked them all.
But, this time I had the power of the process of elimination on my side:
Right off the bat, I ruled out the green and plum ones. I know I said I liked all of them, but I still have a least-favourite.
Next, I nixed the white one. Because no matter how clean you think a workspace is, polymer clay attracts “stuff” like a neodymium magnet. So dust and other bits would show up too easily.
This also applies to the other lighter-coloured ones. So the cream, pale pink, green and yellow ones were gone too.
Black is nice but – like the white one too, actually – it’s all just one colour. So I don’t want that either. A bit plain. However, the turquoise one is also all one colour and that doesn’t look so simple. Same goes for the bright pink. Maybe this situation isn’t all black and white, as it were…
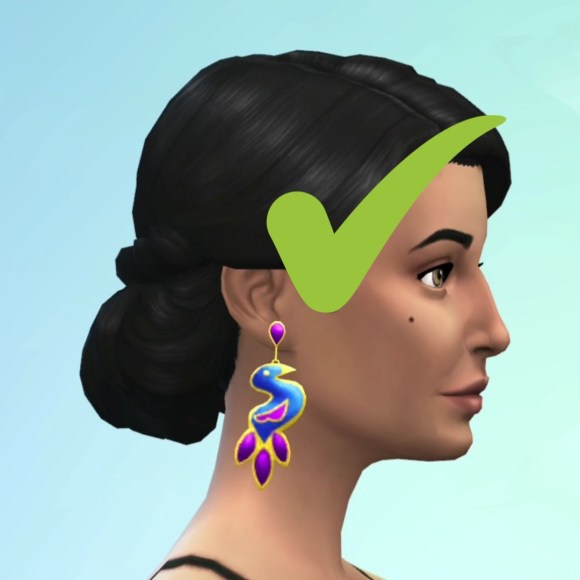
I tend to find it difficult to separate red and green from feeling christmassy, yet for these earrings, I’m not having that trouble. This colour combo is officially the first one on the ‘yes’ pile. And a close second is the blue and purple pair.
Another ‘yes’, this time for the red and bronzey ones. I like the warm, autumnal colours. Even if it does remind me more of a turkey than an elegant, exotic bird. I suppose it would be fitting if I was making them for someone who celebrates anything turkey-related in autumn, though.
And now we are down to a final three. Again.
…
…
… Stuff it. I’m going with the blue and purple ones.
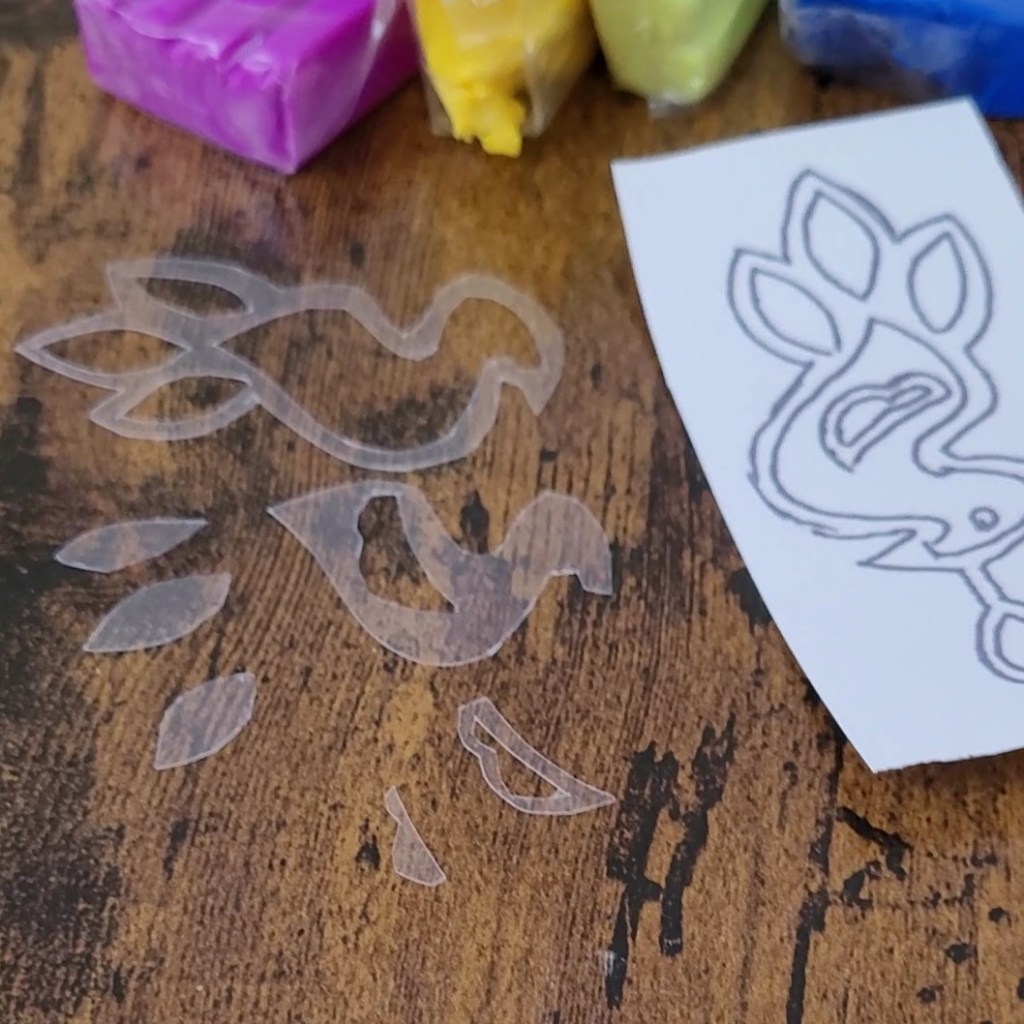
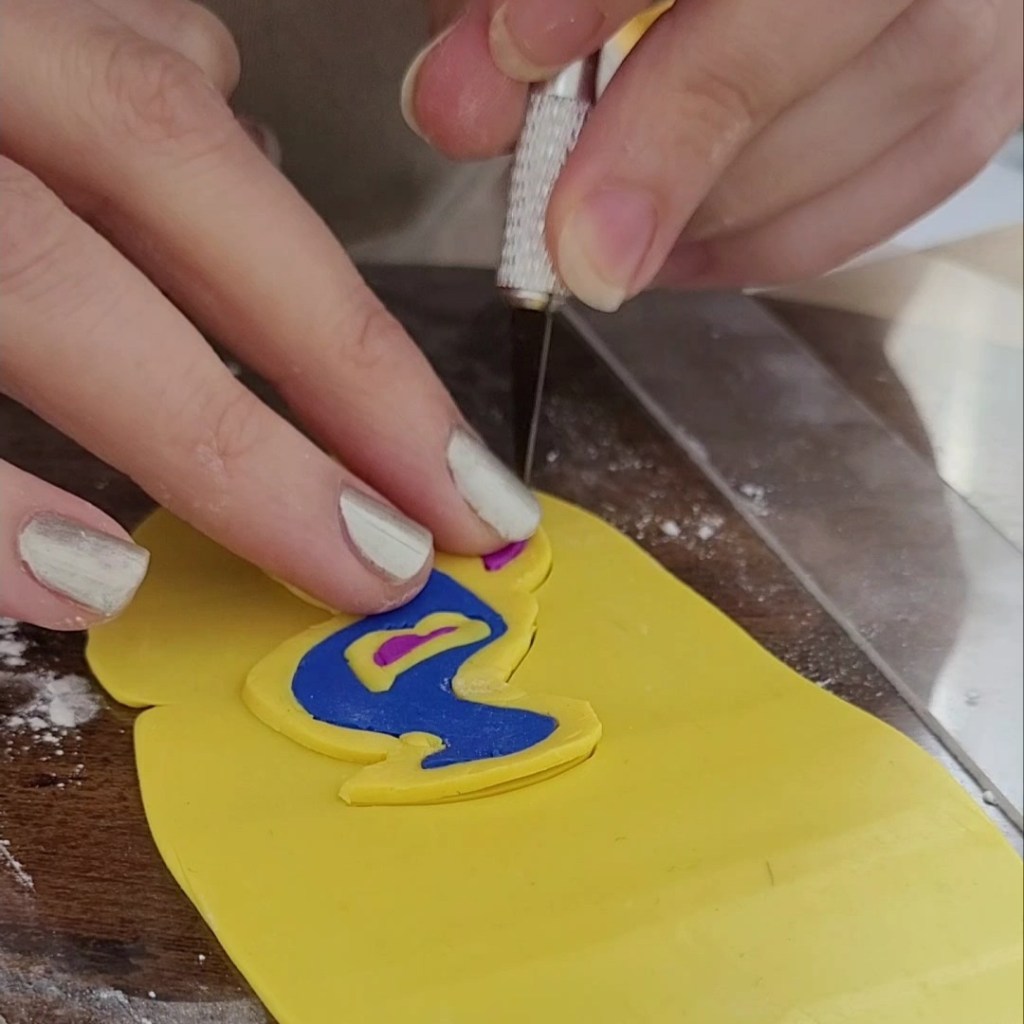
Colours all mixed, stencils all prepped, I can finally get started! Here’s a quick picture dump, in lieu of a full step-by-step guide:
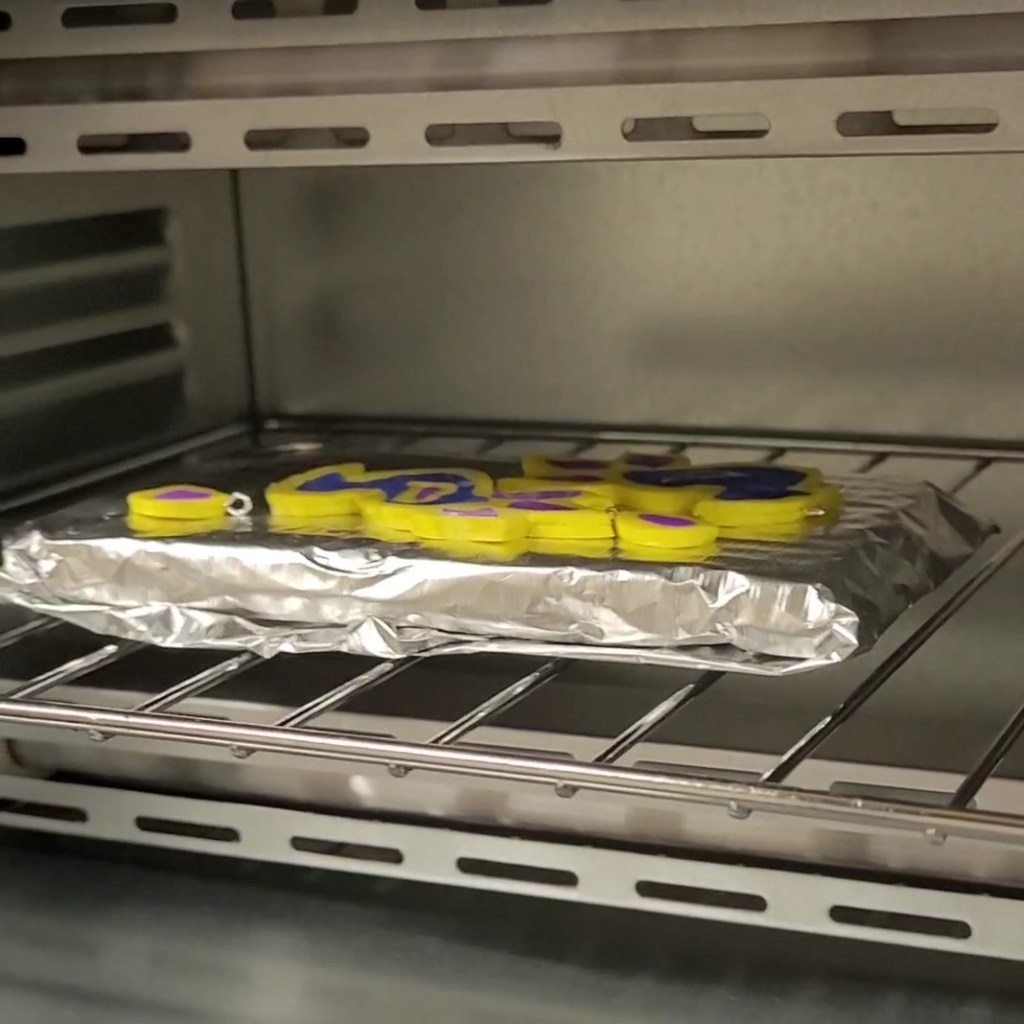
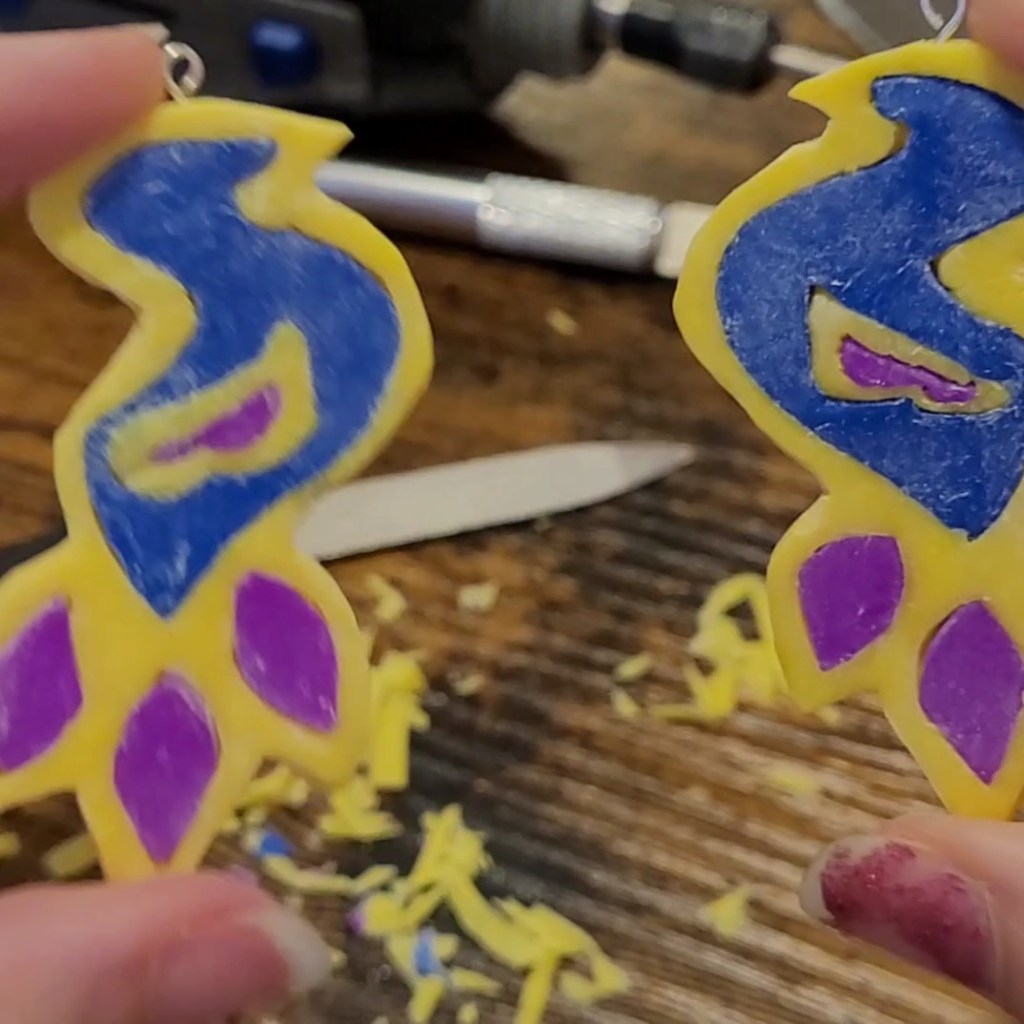
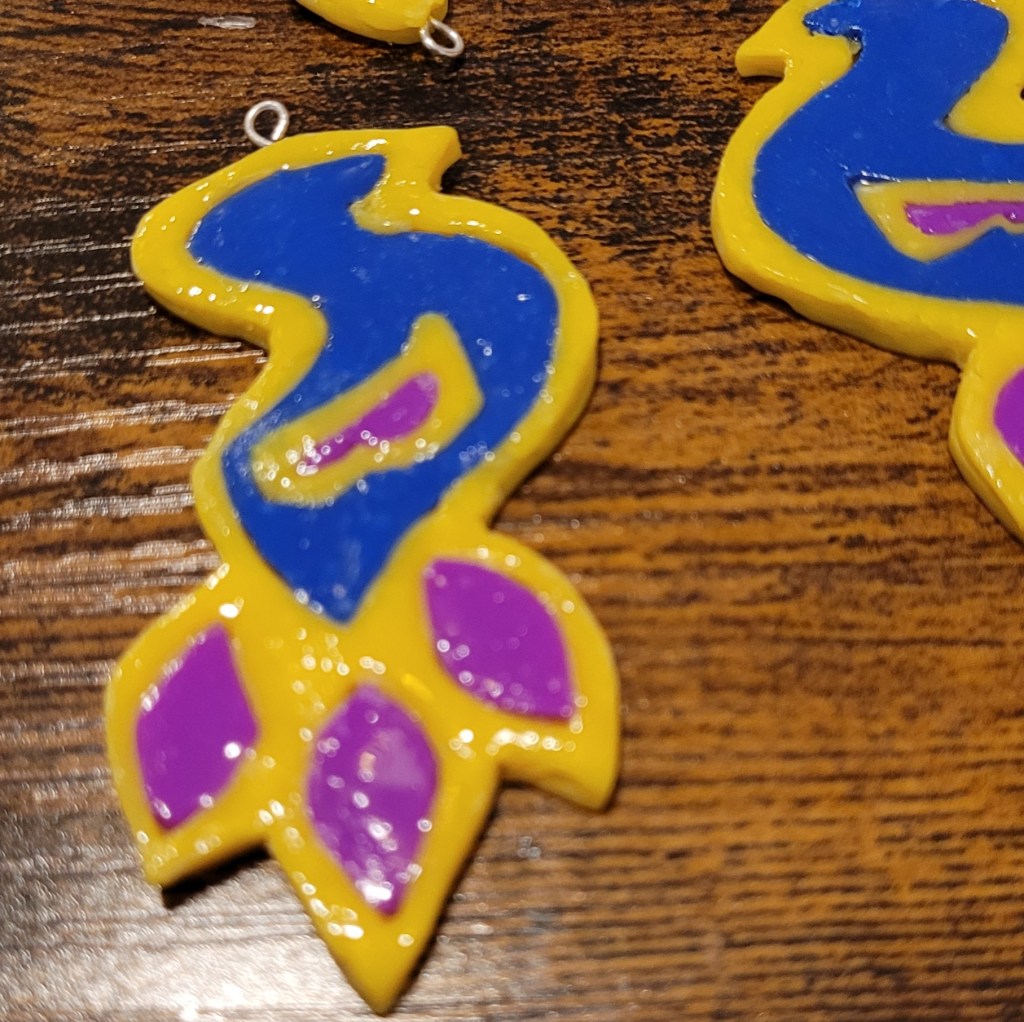
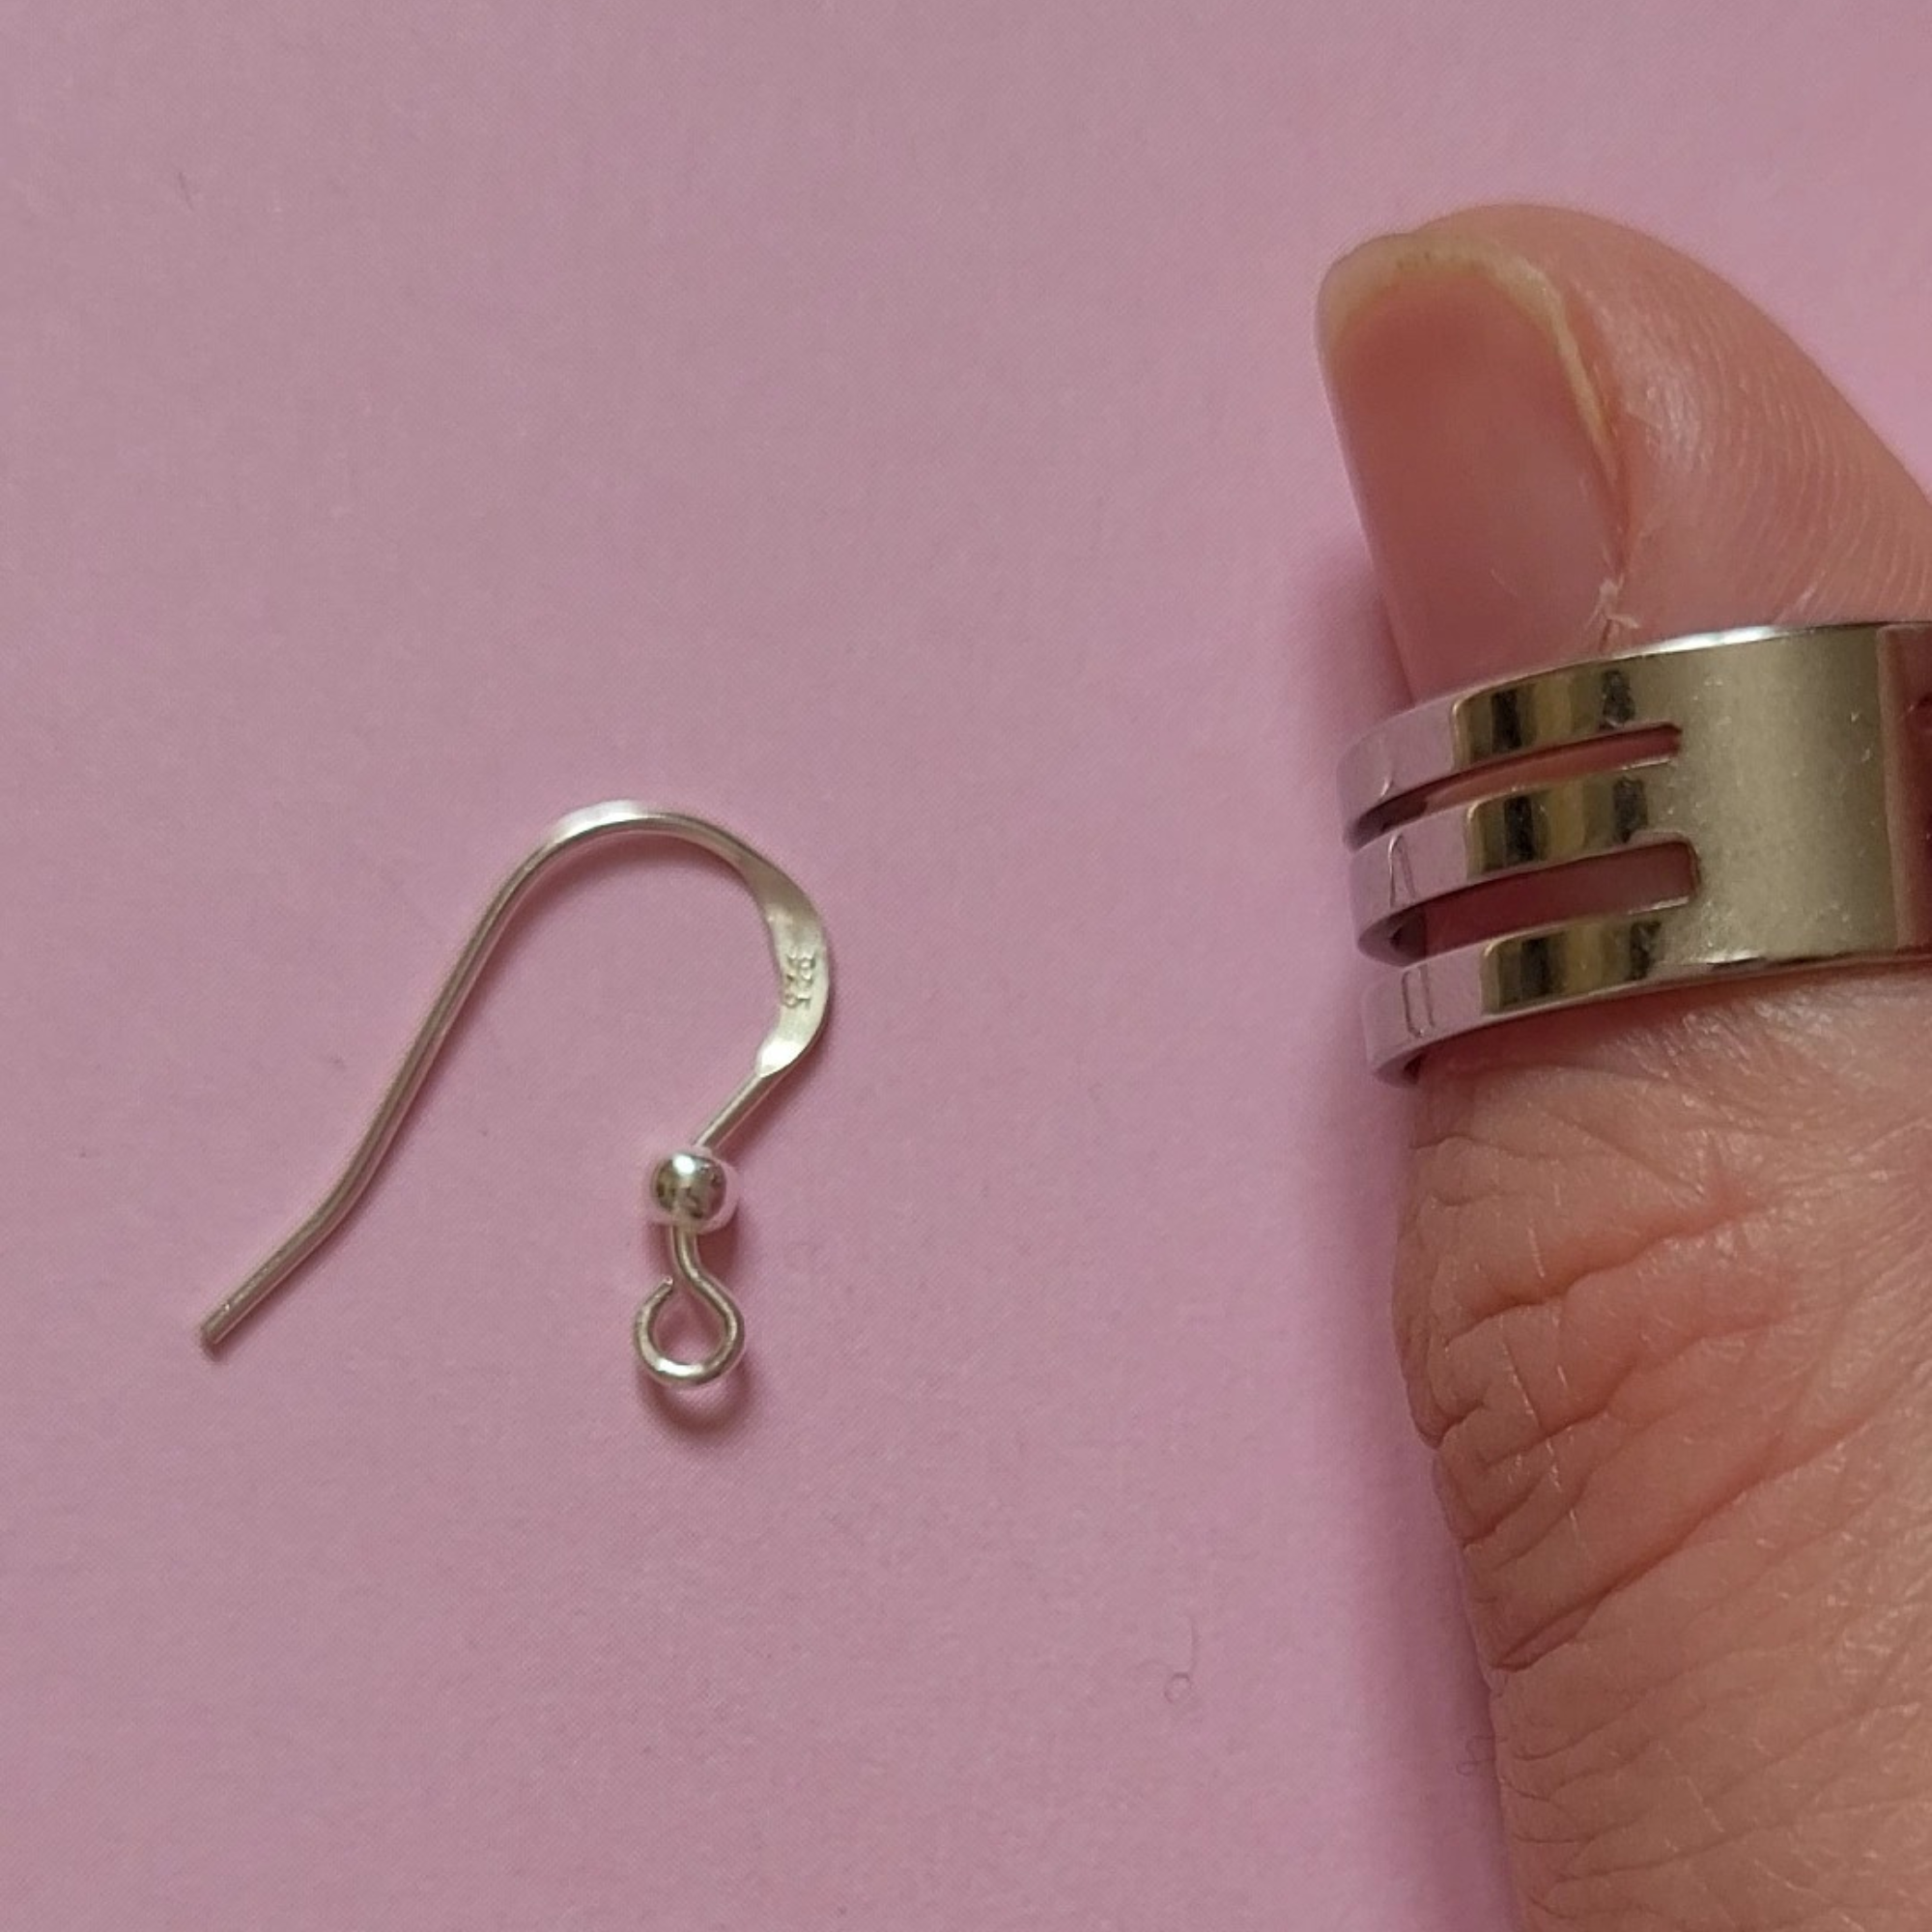
Tried a few different sizes, and it turns out bigger is better!Me at the beginning of this project: This Is Ace(tate)! Needed an extra image to complete my 3×3 gridNearly skipped this step until I realised it would be too thin for the eyepin Almost done! … with the first one anyway. Got to do this all over again for the second earring.Into the oven! I don’t often use polymer clay, so never bothered with a ceramic tile. Kiln block in tin foil should be okay, right? Yes.Shaving, filing and sanding done. Nearly there!A coat of something shiny!View from the back
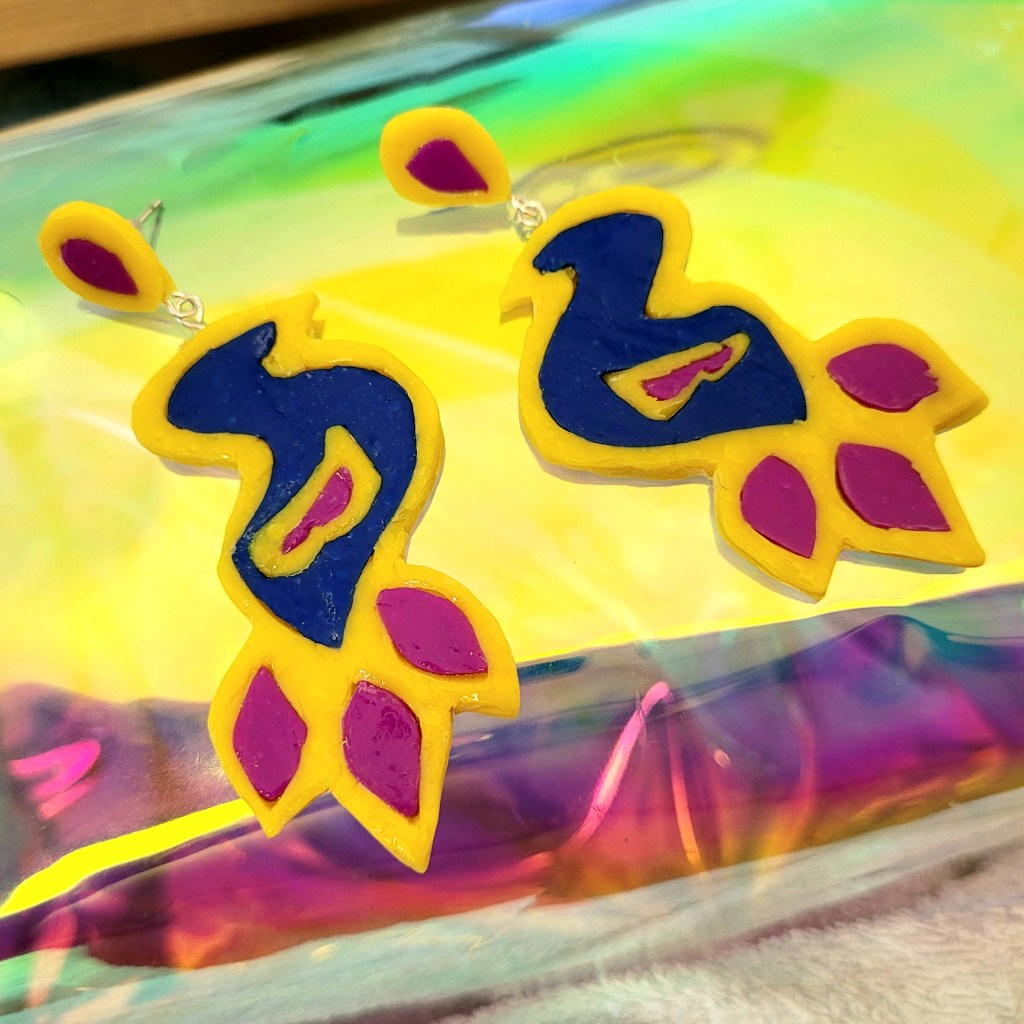
And now, the finished earrings:
“BONUS”: Some shots with Instagram Reels ‘Sims’ filters. The Bella one was a fresh shot of nightmare fuel, and the other one gave me clearer skin and a 10-foot neck.
So, final thoughts? I like them. I’m not completely bowled over by them, but for a first attempt off the back of an idea that was completely on a whim, I’m quite happy. And I love the colours. I’d definitely do this again, making something from a game. Particularlythis one, as everything does have a simple, cartoony look, so it’s fairly simple to replicate. Plus, it’s an excuse to play it, in the name of research!
So I give these a Pass in terms of how they look, but how about wear? I did mention polymer clay being light. And yes, they are very light and comfortable to wear. I almost forgot to take them out because I couldn’t really feel them! So they get a definitely get a higher score for wearability.
If I did do it again – making this pair of earrings, that is, not just something from the game – my main aim would be to make sure the earrings look like mirror-images of each other. This pair are definitely sisters, not twins. I imagine that’s where learning to make a cane would come in very handy. Other than that, I would add more movement. Maybe thinner layers or separating the tail feathers. They’d make nice clicky-clacky sounds too, actually. Yeah, I’d do that.
If you’d like to see me do something like this again, let me know in the comments? Also, let me know if you also grew up playing any Sims games like I did.
Oh, just one more thing before I go: I’ve not forgotten about my upcoming Halloween make, I’ve just not got around to doing anything to prepare for it as of late. A bit of schedule re-jigging should find me some time.
Right, that’s all for now. Thanks so much for popping in and having a read. Have a lovely rest of your day!
If you’d like to see more from me, you can find me on Instagram, Twitter, and Facebook, and of course, you can support me and treat yourself in my Shop (and the Sale is still on until tomorrow night)!
I love summer. Bright sunshine and blue skies, smelling the pretty flowers and wearing flowy fabrics. All of that.
But for some reason, I’ve suddenly caught myself thinking about Hallowe’en. Not autumn, but Hallowe’en specifically. As I mentioned in my first post about last year’s big project, Hallowe’en isn’t really something I’ve bothered with. I went to a couple of parties as a kid, but that was about it, really.
Considering how quickly the year seems to be flying by, it will be October before we know it, so I should probably try working out why I have All Hallow’s Eve on my mind. Or at least, what I can do to stop it interrupting my other thoughts and plans.
I often find something that helps me shake off the nagging feelings in the back of my mind is to take a little bit of time to focus on it; bring it to the front and give it the attention it’s after. And how I start that is make a point of noticing when I think about it.
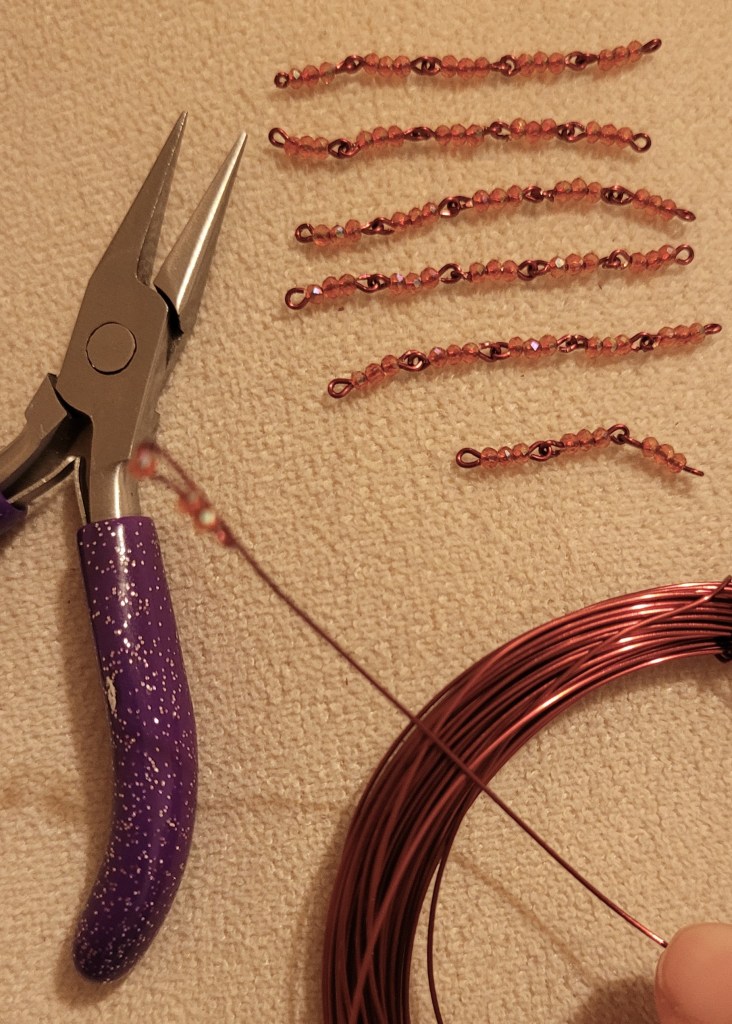
Which is often when I’m making a new piece of jewellery. There’s something about the simple repetition of stringing beads or linking rings that lets new thoughts and ideas flow in.
So that’s probably it, yeah? I should make something new for Hallowe’en. But I did that last year. So? I do like making stuff.
Last year I got 4 blog posts and a cool Dior-inspired choker out of “making stuff for Hallowe’en”. I wonder what this year will get me. Maybe the sooner I get started, the sooner I’ll know.
I could make another choker? No, although I am thinking something bigger than a ring. A bracelet, then. That’s a more likely option.
Now, what can I do to condense Hallowe’en – the first of the two nights in a year (depending on where you’re from and the stories you grew up on of course) I can think of when the dead get to wander the earth – into something you can wear around your wrist? Sounds a bit much when I put it like that. All right, as long as it’s something spooky, or creepy; a bit “off”.
As last year’s project was a bloody mess, so to speak, this one should be nice and neat. A bit of repair work.
Right, that’s all for now. Thanks so much for popping in and having a read. Have a lovely rest of your day! I’m off to do some research; see if I can stitch some inspiration together.
There’s more to come as this project develops, so please subscribe if you don’t want to miss future posts. And of course, likes and comments are muchly appreciated.
If you’d like to see more from me, you can find me on Instagram, Twitter, and Facebook, and of course, you can support me and treat yourself in my Shop!
Hiya! Happy Monday! Today’s going by quite quickly, isn’t it?
Something that didn’t go quite so quickly for me, though, was an order I placed a little while ago and was sadly delayed. It was worth the wait, though: when you’re presented with the option of adding a mystery parcel of gems to your order for a cheeky little price, take it if you can! I did. And I ended up with some absolutely beautiful pearl drops!
I really like pearls. As you’ll likely know from me having made a few posts about them before. So happening to have received them in particular, over literally anything else the shop might have had in stock feels “right” somehow. The cynic in me, though, is wondering if it was just a way of clearing leftover stock as it’s not been June for a while and they needed to make more room for the rest of the year’s birthstones, so me happening to get real, actual, freshwater pearls is a coincidence.
But what do I do with them? I could just keep them. But that’s not why I added the “mystery parcel” to my order. I added it because A: I could leave it to fate to decide what I could make for someone else to own. I didn’t know whether I’d be getting a whole strand of beads, or maybe a ready-for-setting cabochon or faceted stone. They could have been a colour I hadn’t considered using before. And B: I can rarely resist an impulse buy. Which is kind of the point of them. Whatever; it was a relatively low-risk gamble to get more pretty, shiny things to work with.
But how much work do I really want to do with them? I must admit, I’d been feeling weirdly guilty lately that I hadn’t made much headway on getting my kits together, never mind making them available to buy.
It’s a nice, simple make. Very straightforward, nothing particularly fiddly or finicky to be getting on with. And the best thing is, you’re not left with lots of bits and pieces to throw away afterwards!
Whether you make them for yourself or someone else (as long as your or they have pierced ears), there’s a cute little pouch and box to store or present them in.
I enjoy putting these kits together; it’s no more difficult than making a stretchy bracelet, and doesn’t take as long either. And I’d like to expand the range, too. Different colours, stones, metals. Maybe even making them available for non-pierced ears. And of course, varying up the presentation box and pouch options will be fun as well.
I’ll just have to see how well this goes, anyway. I’m more than happy to keep making finished pieces for you to purchase, but it is as nice to be the reason someone gets started on a new hobby, as it is for me to be able to look at something and be proud that I made it.
Right, that’s all from me for now. Thank you so much for popping in and having a read. Have a lovely rest of your day!
If you’d like to see more from me, there are other posts on the blog to read if you haven’t already. Plus, you can find me on Instagram, Twitter, and Facebook, and of course, you cantreat yourself and visit my Shop)!
I’ve been trying out different jewellery-making techniques over the past few months: working with precious metal clay and getting to grips with a kiln; trying to achieve that “real marbley stone” look with polymer clay and resin (those videos absolutely dominated my social media feeds for quite some time earlier in the year); prong setting individual stones; reviving my long-forgotten love for chainmaille weaving. But I didn’t feel like there was any real point to the pieces I made, other than serving as a physical reminder that I was convinced whatever the technique was would become My Thing.
The image in my head was always better than the finished product, though. I know it’s likely that all I needed to do with any of those ventures was to stickat it, and it wouldn’t be long before I’d see an improvement, impressing myself with my new-found talent. But I am impatient and I want to be great at whatever I’m trying immediately. So sticking with something I’m not an Instant Pro at, really is difficult.
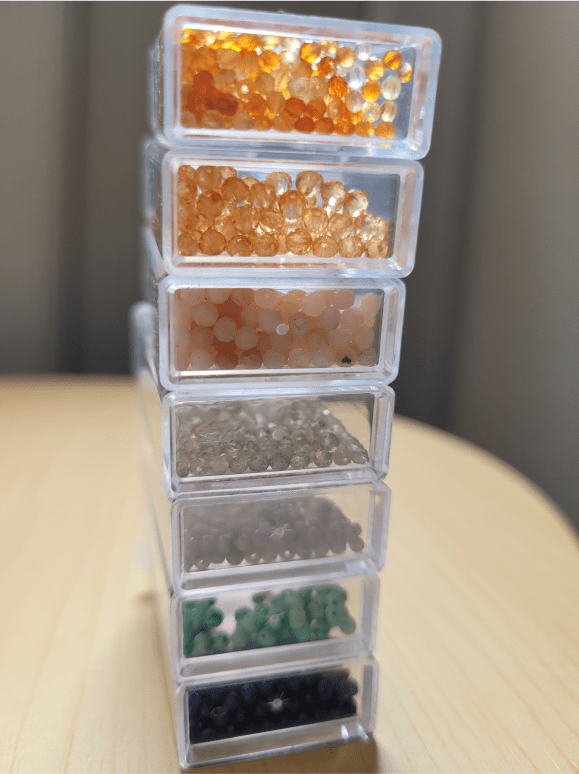
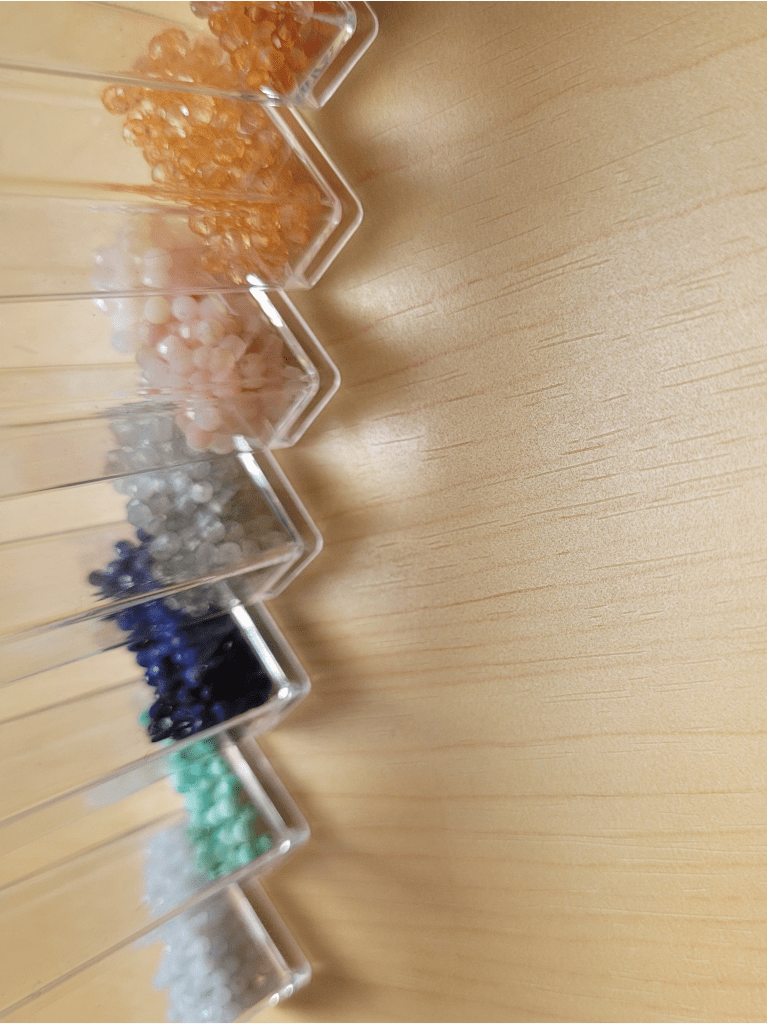
And then it just so happened that I got my hands on some strands of the most gorgeous, tiny little faceted beads recently, and I’m having a great time.
They’re all precious stones, which is something I tried to keep away from for as long as possible: making your own jewellery is not a cheap hobby, even if you sell your pieces. Plus, though it can be easy to forget, they’re naturally occurring rocks that have to be mined; they’re pretty much a finite resource with a big environmental and economical impact. Another reason I want to find out where I can source lab-created gemstone beads. But in terms of availability, especially if we’re looking at the bead-quality, stringable kinds, natural stones are more readily accessible. Accessible even to me. Me! Incredible.
Although I said “precious stones”, and went on about how jewellery making is not a very bank account-friendly hobby, I should point out that I’ve not omitted any of the Big Four from my little photo gallery above. ‘Precious’ isn’t a word reserved for diamonds, emeralds, rubies and sapphires anymore. I read something the other day that commented on how gemologists are moving away from referring to stones like opal and turquoise as ‘semi-precious’, and I love that. Diamonds aren’t all that. Well, they are. It’s just that so many other gems deserve the love that those clumps of glittering carbon get, too.
Anyway, like I say I’m having a great time, with all the different colours and shapes. Well, not “shapes” plural; it’s all strand after strand of spherical sparklies as you can see. And I think that’s the beauty of it.
Being quite an untidy person, both in mind and in… well, in general, I appreciate a bit of uniformity. It’s quite satisfying to see evenly sized things in even rows of even numbers. It might sound a bit silly, but I think this “sameness” is a key ingredient in making a good-looking piece of jewellery. For me, anyway. Fully content to only speak for myself here. And it’s quick, too! Always a plus. For example, I got three stretchy bracelets done the other night in roughly the time it would take for me to weave a few inches of Byzantine chainmaille. Which is still not very long, but it’s a lot easier to write a product description for my next Etsy listing right after making dainty little bracelets than inches and inches of individually and intricately linked chain.
So stretchy bracelets is where I’m at right now. And rings. Stretchy rings are something I didn’t know I needed in my life. I’m back in my comfort zone of stringing one bead after another after another. Reassuringly predictable: Add your beads until the desired length is reached, tie a secure knot, add a blob of glue, wait for that to dry, and Robert’s your mother’s brother!
In some ways, it might have made more sense for me to make the strands go further by using them more sparingly. Maybe adding a one or two beads onto a pair of drop earrings, or every few inches or so on a chain necklace. But that would feel like treating them as commas or full stops at the end of a sentence, when in actual fact they are the whole sentence.
That could well be the most pretentious thing I have ever written, and I can’t decide whether I’m sorry about it. I’m not deleting it, though.
You should see the bracelets in my shop very soon. And maybe rings, too. I somehow have enough of the beads left that I could get a few more rings out of the strands.
The aim is to have them all up and listed by 10 July. There’s no particular significance for me about that date, it’s just that on the day before I started typing this (1 July), I’d posted on Instagram about them being available in my shop next week. And the 10th is the last day of what is still at the time of writing, next week. Also it rhymed nicely with “sneak peek”.
Right, that’s all from me for now. I still have some more fine-tuning to be getting on with before my newest pieces are ready to be released into the wild. In the meantime, I have a quick question: Could I get a show of hands on who’s interested in the idea of a little jewellery Top-Up/Refresher/First Aid kit kind of thing? Safety chain, spare earring backs, small carabiner clip, all in a nice little fabric pouch? Just comment “Yes” or something if fancy the sound of that.
Thank you so much for popping in and having a read. Have a lovely rest of your day!
If you’d like to see more from me, there are other posts on the blog to read if you haven’t already. Plus, you can find me on Instagram, Twitter, and Facebook, and of course, you cantreat yourself and visit my Shop)!
I’ve not really written a review for anything before; I just tend to give whatever it is a star rating and go about my day. But I need to keep posting to my blog regularly if I want people to read it, and I was a bit stuck for inspiration, to be honest. So here we are.
If you want to skip the prologue, scroll down now to the heading “First Impressions”. If you don’t, then just carry on as you were; it’s only a few short paragraphs.
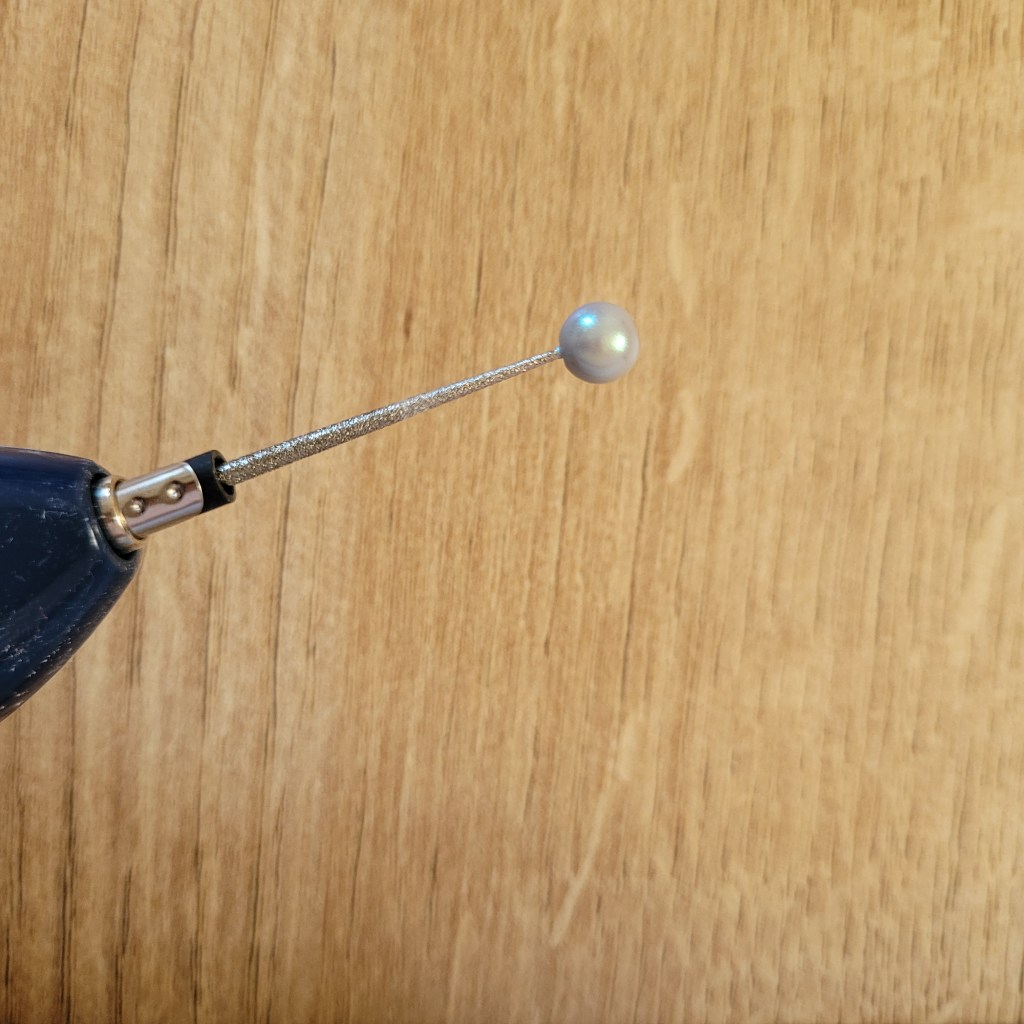
I bought this bead reamer because I love a gadget, and I use beads in pretty much every piece of jewellery I make. But also, because I’m still in the fine tuning stages of Kit Prep, and my old one is quite worn down now.
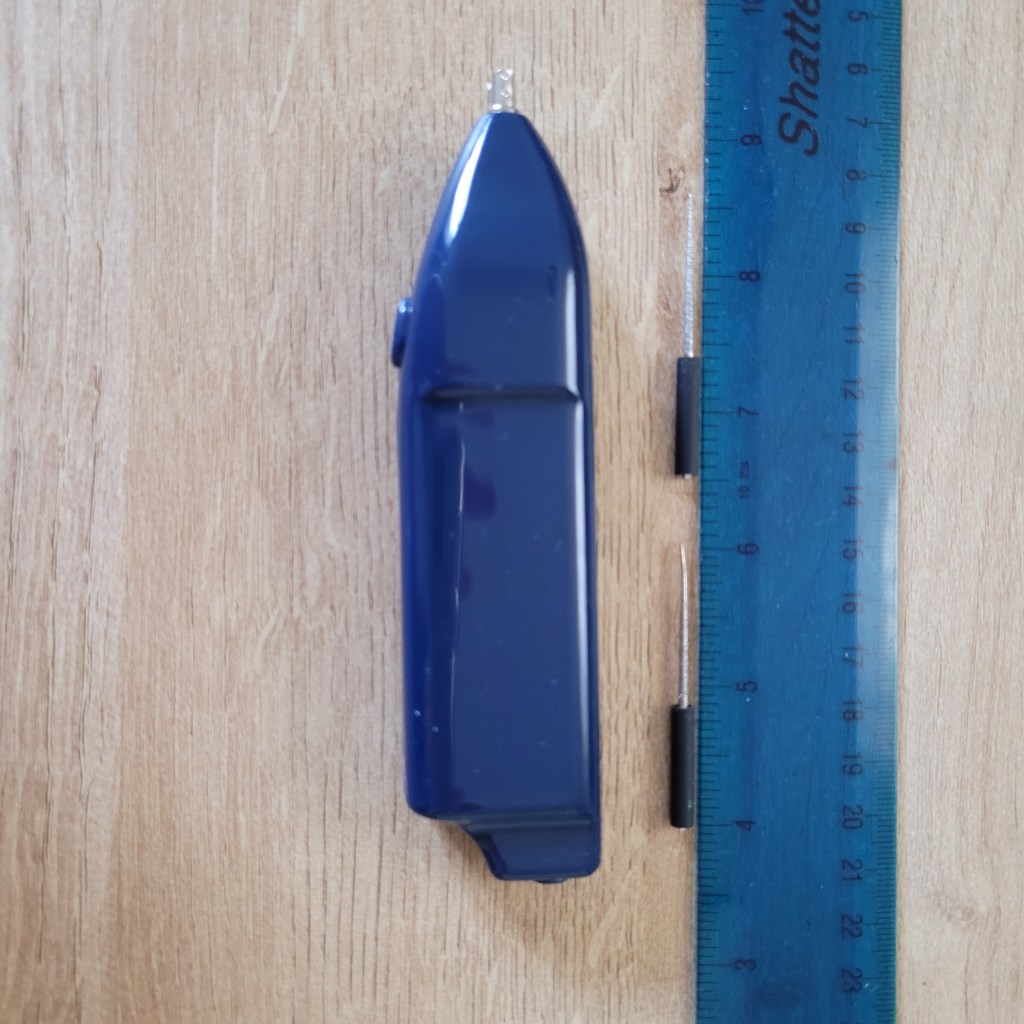
L-R: Shiny, new slim bead reamer tip Vs. Dull, old, chunky manual reamer
When I make jewellery, I don’t mind all that much if it’s a bit of a squeeze to get a bead through the needle and onto the strand. But I do mind when it frays the thread or I poke myself with the needle, and I obviously wouldn’t want that to happen to anyone else. So the solution is to make the hole bigger. Feel free to make your own jokes here.
And so comes the need for a bead reamer. Basically a long, thin, round tapered file for, well, filing away at the inside of a bead. And this one is battery powered, because why not? Actually, there is a point: it’s to get through the process more quickly.
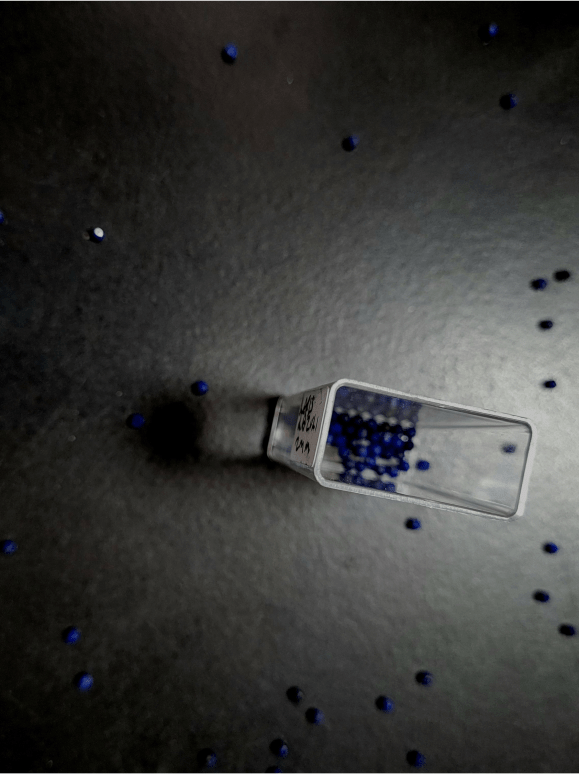
It looks alright: plain dark blue outer casing. Plastic. Feels pretty solid and sturdy, and there’s a nice grip to it; it’s just fine. I wasn’t expecting a bead reamer to wow me with its design anyway.
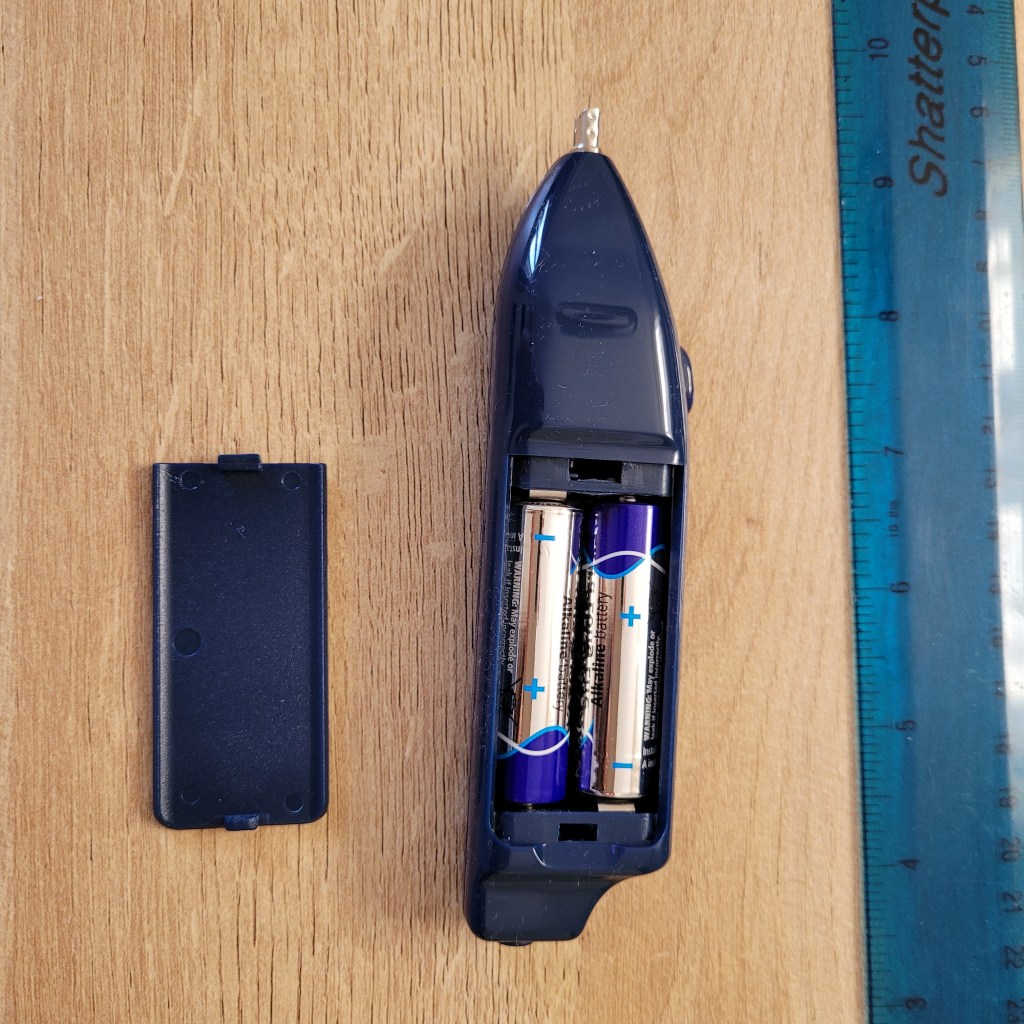
It’s got a nice weight to it, both before and after I put the batteries in (it needs x2 AA batteries), but there wasn’t a noticeable difference either way.
The two tips it is supplied with are the same length (about an inch or so), but one looks to be slightly narrower than the other. They feel quite coarse and the ends are pretty pointy, so they’d probably be quite effective even when the batteries run out.
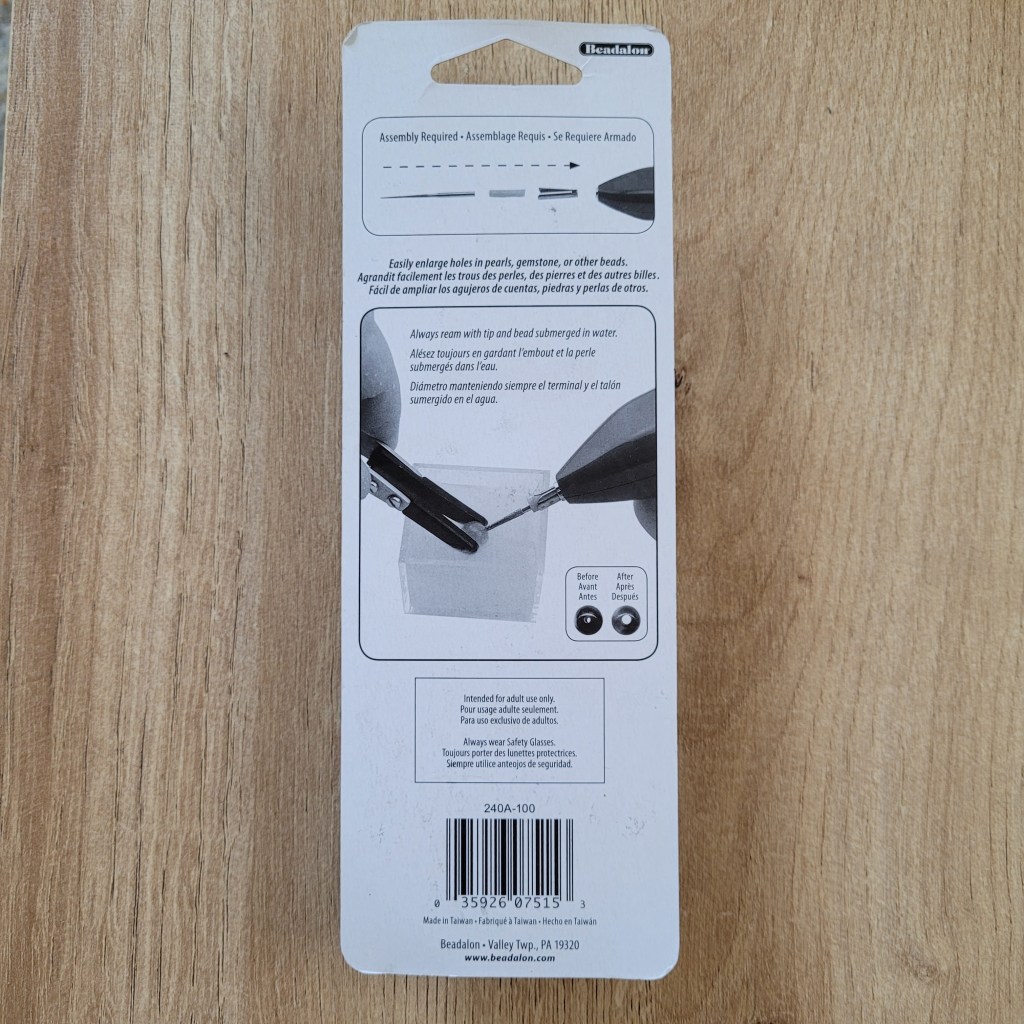
Using The Thing
Instructions on how to put it all together and get it running are all printed on the back of the packaging, but really it’s so easy and intuitive it probably doesn’t need to tell you. Inserting the batteries is maybe the most difficult thing, and that’s simple enough; just pull up the little lid thingy, pop the batteries in, put the lid back on and you’re good to go. The lid thingy closes with a nice little “click” too. I always appreciate that.
I’d sorted some spare beads of different sizes and materials (glass; semi-precious stones; my favourite synthetic pearls by Preciosa I’m often banging on about) to see what it works best with.
The On/Off button is one of those press-and-hold-to-use types, where to stop it you just let go, so that’s simple and easy enough to use.
reamer with 6mm bead
Sound-wise, on a scale of “Cat Purring” to “Wasp Flying Next To My Ear”, I’d say it’s somewhere in the middle, but closer to the wasp one. It sounds more or less like a phone vibrating, so it’s however irritating you find that, really. But it is quiet and I didn’t have to listen to it for long – beads are only small – and I generally wear earbuds all the time anyway, so I wouldn’t usually pay attention. Off-topic, but podcast recommendations are much appreciated if you have any; I like true crime as much as the next person, but I really should find something else to listen to.
**UPDATED 15 March ’22** I’m sitting here, ears undefended while my earbuds charge (the hardship). And I have to say, having used the reamer for about an hour now, it’s really irritating. And loud. I used new batteries this time. So yeah, if you need to use one of these, it’s definitely worth getting something to stick in/over your ears first.
One thing I noticed is it does kick out a fair bit of dust, which is to be expected. Especially from the glass and semi-precious beads. But because it’s electrical, I don’t think it would be advisable to dip the tip in water before running it into the bead hole, as you can with a standard bead reamer. I had a quick Google anyway, but I couldn’t see anything that said it’s water-resistant/proof, so I will assume it isn’t. I just wiped a damp cloth over the tips once I’d removed them from the… unit(?) and rinsed all the beads in water afterwards, so they shouldn’t have any dust left on them.
As I won’t be treating it like it’s waterproof, I found it best to run the reamer through the holes in short bursts, to reduce any chances of cracking from overheating. Though I didn’t notice the tip or the unit itself getting particularly warm anyway.
Before & After
All of the beads coped well with my attempts to reduce their all-over surface area, though I wasn’t exactly going out of my way to mishandle them. The neon apatite bead was the most difficult, though. I barely got the reamer tip even halfway in from either side, even after trying for a few minutes. It also got a bit scuffed and marked because it was the first bead I tried the reamer out on, and wasn’t quite used to holding it and hadn’t quite put the right amount of light pressure on the On/Off button. I would say that – thankfully – it worked best on the synthetic pearl, filing away at the crystal interior far more easily and quickly than the other beads. I also had some success with the sodalite bead too. Now I think about it, it might be because they were the two most spherical beads, so it was easier to get a grip on them. I probably should’ve made sure the others were similar sizes and shapes too. So that’s a fault on my part.
Thoughts
I like it. Glad I bought it, but I’m pleased I didn’t have to pay more for it. I can tell it will last a good while, which is a plus as I will be getting a lot of use out of this.
Because it is battery powered, and therefore rotates many, many times faster than I could do by hand, I’m also wondering how else I could use it. For example, how effective it would be for etching into things. I know that the synthetic pearls I tested the reamer on are supposed to be scratch resistant (one advantage they have over natural pearls), and though I did accidentally slip a few times on my first couple of gos, the beads didn’t appear to have any scuff marks or scratches. But, as I mentioned, my neon apatite didn’t make it through this test completely unscathed.
Rating Out Of 5?
I’d give it a 4. It’s great for what I need, but I don’t think it’s worth the £19.99 RRP, so if you need one and can get it for less than that like I did, pick one up.
That’s all from me for now. I still have some more fine-tuning and R&D to be getting on with before my kits are ready for you, but I am aiming to have something ready in time for Mother’s Day (UK Mother’s Day, that is. 27 March isn’t that far away!). In the meantime, I want to say thanks so much for popping in and having a read. Have a lovely rest of your day!
If you’d like to see more from me, there are other posts on the blog to read if you haven’t already. Plus, you can find me on Instagram, Twitter, and Facebook, and of course, you cantreat yourself and visit my Shop!
We hear that a lot – both directly and indirectly – us jewellery makers. Anyone crafty, really. That someone else could make the thing we made. And yeah, they probably could make that thing, but 1) pointing it out is a little rude, and 2) they should know it’s a really lovely feeling knowing that, of all the handcrafted pieces available to them, somebody else chose the thing I made, to own for themselves even though they also could probably make the thing too.
Right now I’m working on putting together jewellery making kits for beaded bracelets and necklaces that you will be able to make for someone special. Yourself can be that someone special, if you like.
There are lots of kits available elsewhere already, but more often than not, once you have your completed piece, you’re left with a load of bits and bobs that might be useless to you and will just end up being chucked away. Also, they tend to be aimed at children or younger teens, so the packaging reflects this.
And it’s the packaging that I gave the most of my focus to when I started jotting down my ideas about the kits. I want it to look “grown up”, but more importantly, I want to be sure that anything left over can be recycled or disposed of with minimal waste.
Let’s start with the sleeve box it all arrives in:
Slim enough to fit through a letterbox; ideal if you’re sending it as a surprise gift to someone else who likes to make things, or if it’s for you and you know you won’t be in to collect it.
Made from Kraft card that is 100% recyclable. And roomy enough to use it to store other bits and pieces, so you might want to keep it for storage. Somewhere to keep other jewellery, pehaps? Makeup? Sweets? Sewing stuff? It’s 2022, we can give the Danish biscuit tins a rest now. Maybe glue a fabric tab on the sleeve to keep it easy to open? You could discard the outer sleeve bit and just use the box as a little tray for bedside stuff.
If you are giving it as a gift, cover it – sleeve and all – with wrapping paper, tie a pretty ribbon around it, et voilà! Now it’s a gift box! And someone else’s problem!
For what it’s worth, my personal advice would be to put the empty box on the floor and see how long it takes for your cat to try getting in it. You should then tag me in any pics or videos you post.
What other packaging paraphernalia will you find in the box?
A little square of Kraft card to keep the beading needles in one place while you’re not using them. Once the jewellery piece is made, keep the little card so you don’t lose the needles, or repurpose it as a bookmark or something.
A cute little velvety pouch which serves as an easy gift-wrap option if you’ve made the jewellery as a present for someone else. Or as something to store it in if it’s for yourself. If you have somewhere else to store your new handcrafted jewellery piece though, there are still plenty of ways you can make use of the pouch. You could fill it with cedar and hang it in your wardrobe to keep moths out. Or keep your crystals in there. Or other jewellery? Not with the piece you made, though. It’s best to store jewellery pieces on their own if you can help it.
And now it’s time to talk about the jewellery you’re making. There will be a few options. Whether you choose precious metal or precious metal-plated, or semi-precious stone beads or synthetic, everything will still have been packed with the same care for quality and ease of use.
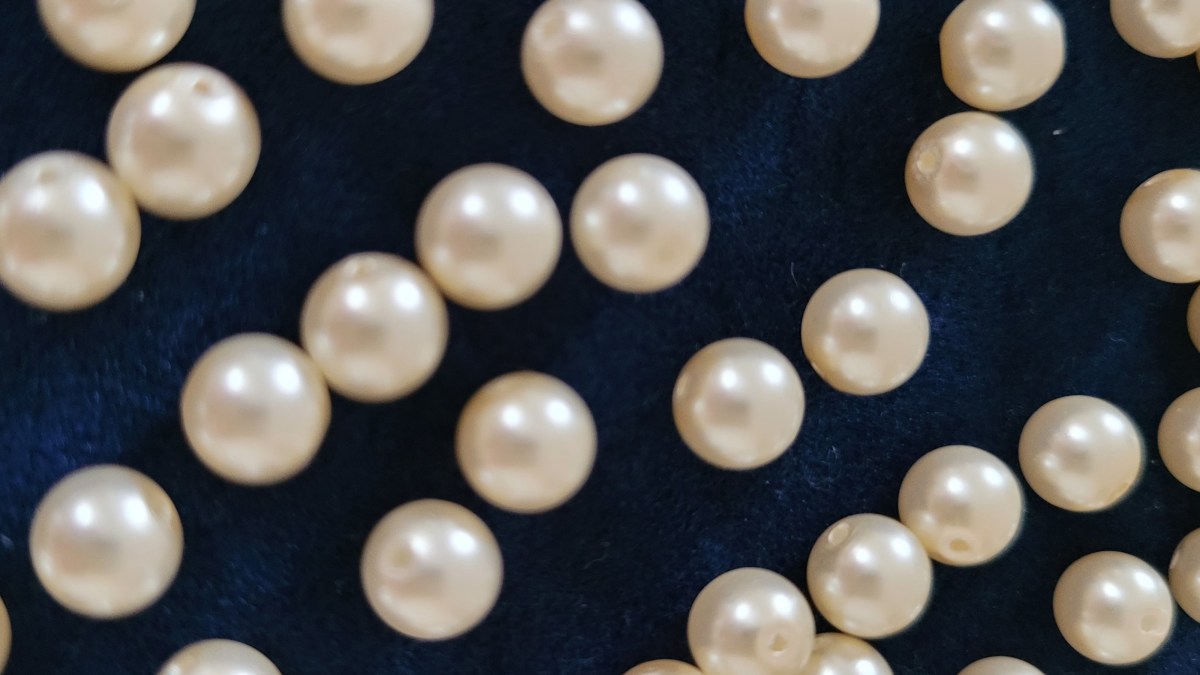
As you will know from my previous posts, I’m a fan of a particular type of synthetic pearls, so I want you to be aware that any pearls in my kits or ready-finished pieces of jewellery will be these synthetic ones. For one, it will keep the kits and pieces far more affordable than if they were genuine pearls.
I am looking at other stones – genuine semi-precious stones – and crystals, to include in the kits in case pearls are not your thing. My favourite is labradorite, but I find it makes more of an impact in a piece when used as an accent rather than the main feature.
I want to include birthstones, especially if I can get my hands on the real thing. But April, June and September babies, I will be making sure you get a beautiful alternative. Comment below what your favourite gemstone is, and is it your birthstone?
You can choose whether your kit will be for a bracelet, a necklace, or both, or even an anklet, and it will include pretty much all you need: thread, beads, clasp. If this feels limiting, it is intentional. Taking into consideration both the reusability and user-friendliness of the kits’ contents, it is important that things are kept as simple as possible, so you won’t need to get hold of any specialist equipment just to make these one or two lovely pieces of jewellery.
That’s all from me for now. I still have some more fine-tuning and R&D to be getting on with before my kits are ready for you. In the meantime, I want to say thanks so much for popping in and having a read. Have a lovely rest of your day!
If you’d like to see more from me, there are other posts on the blog to read if you haven’t already. Plus, you can find me on Instagram, Twitter, and Facebook, and of course, you cantreat yourself and visit my Shop!
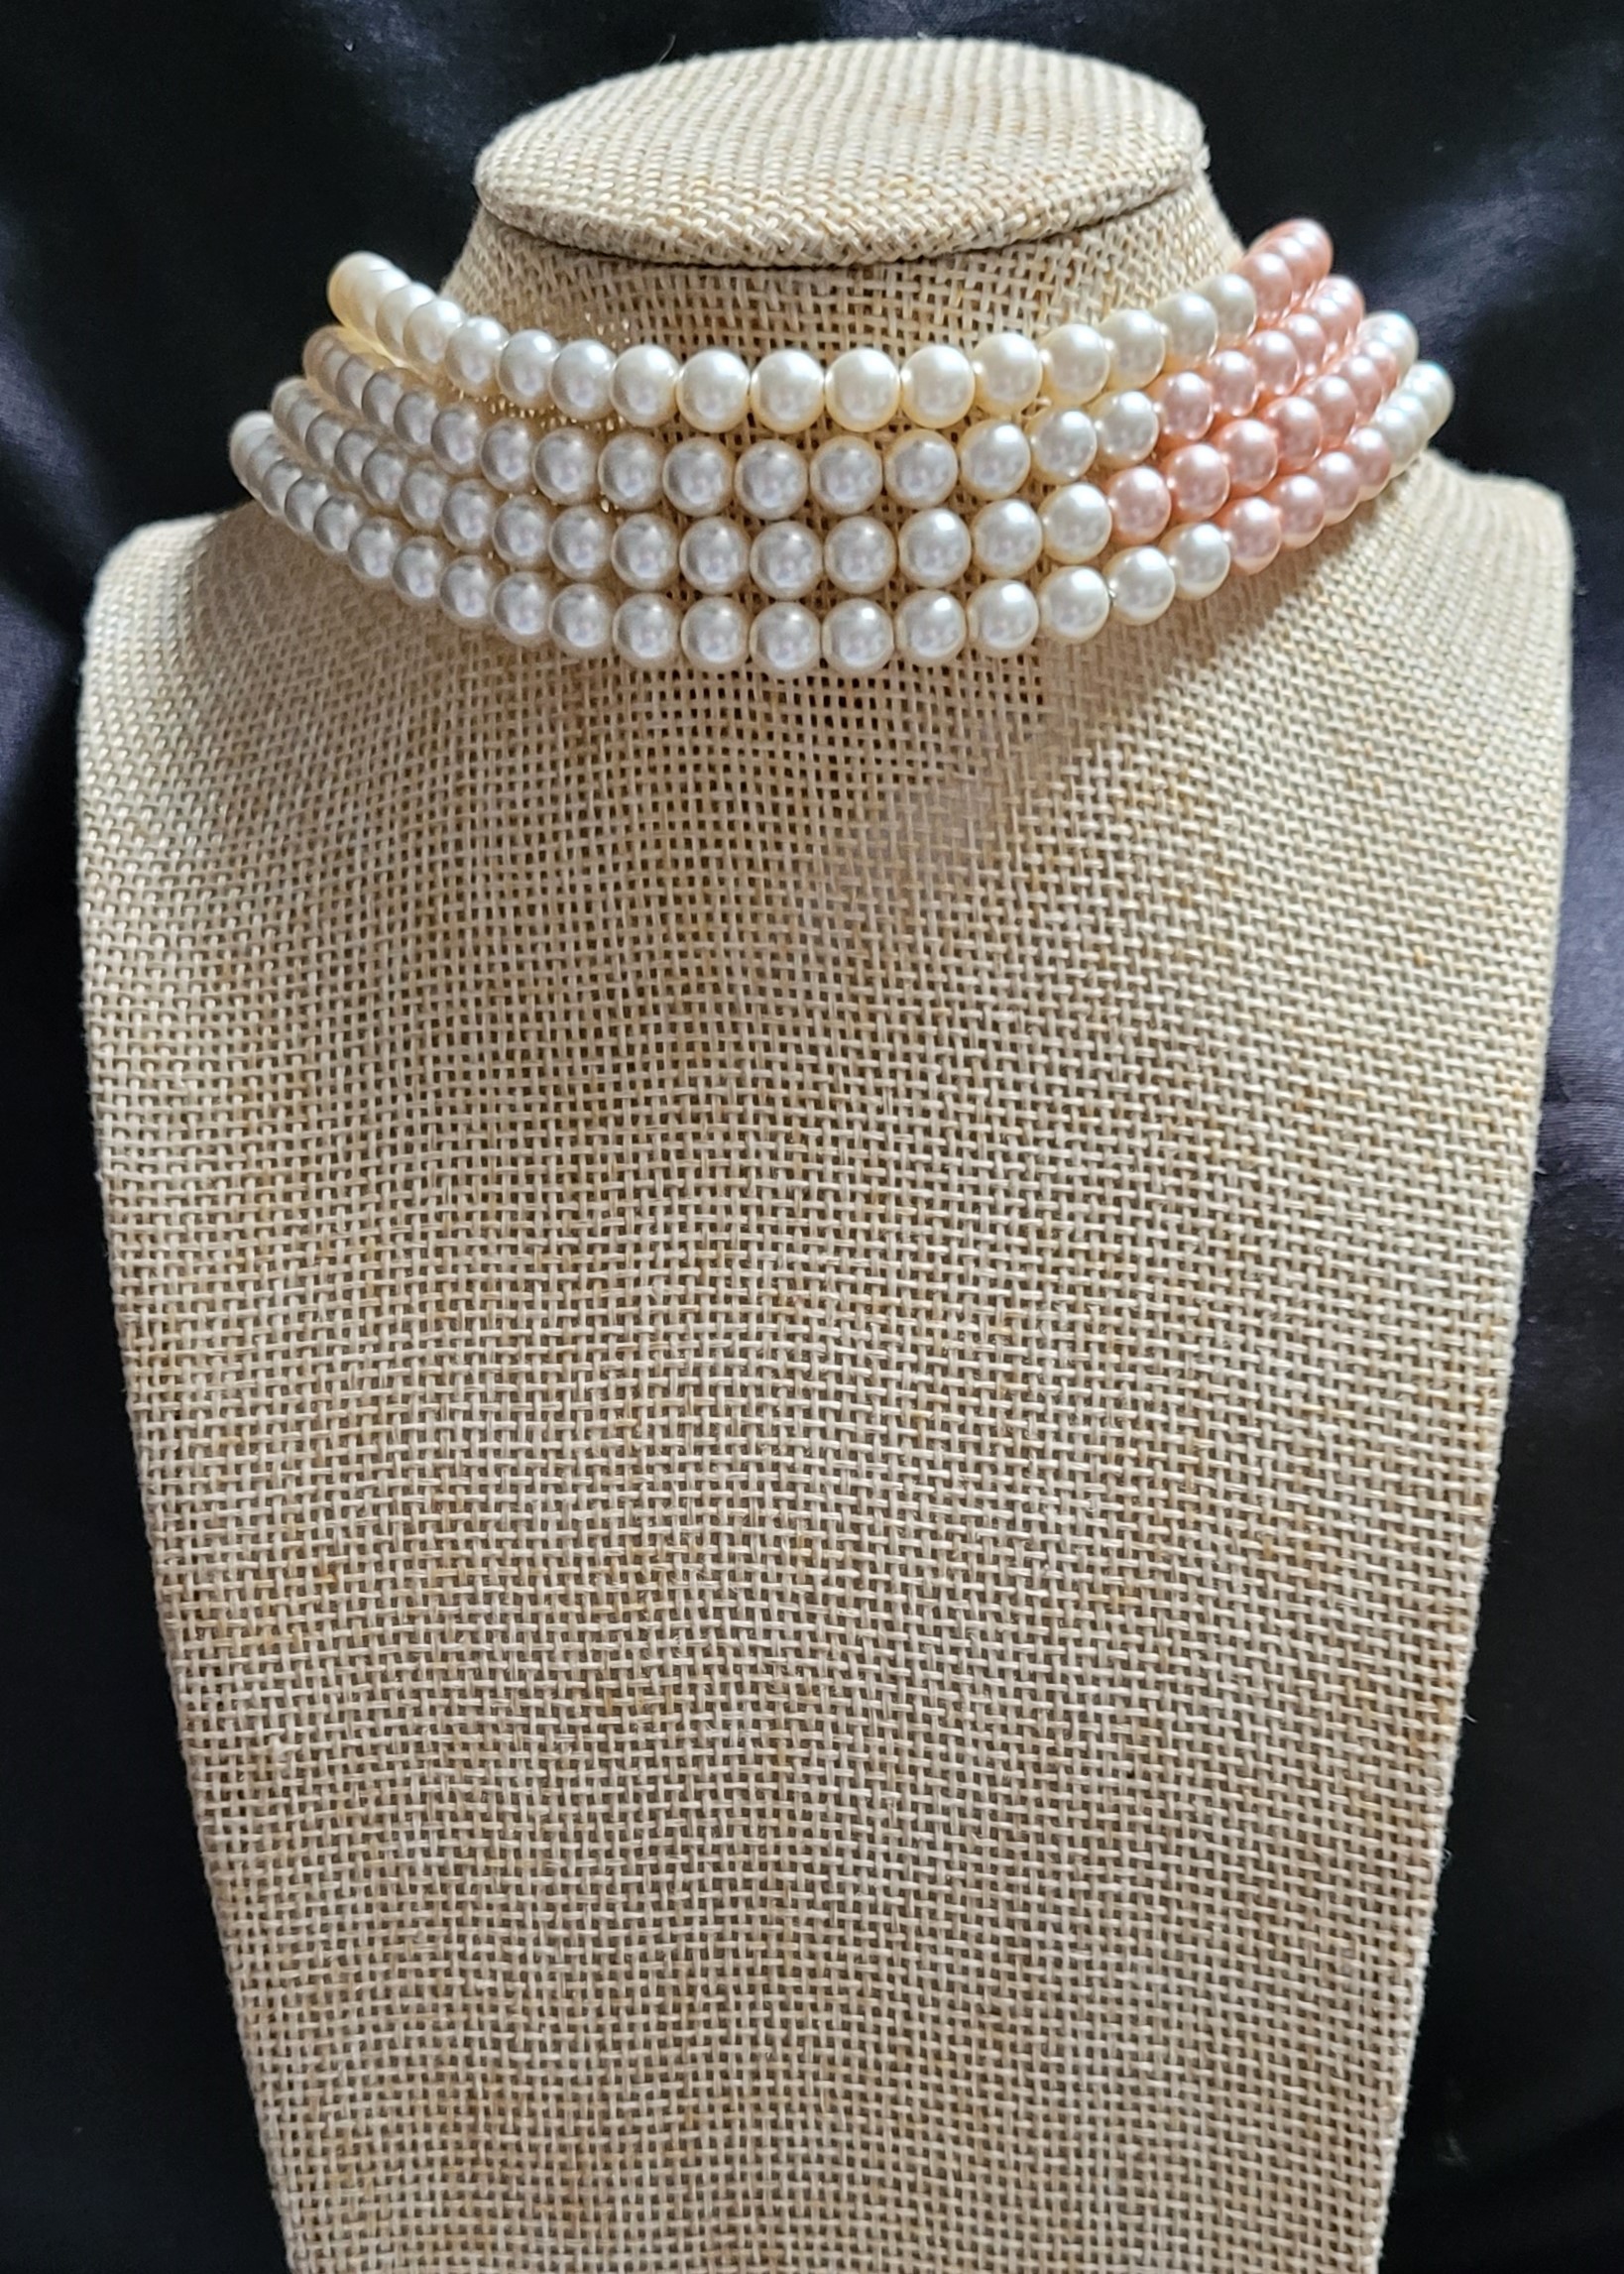
Everyone loves pearls at the moment; they feature heavily in a lot of new jewellery collections from big designers and the high street.
Jewellery created with precious metals and other precious or semi-precious stones will include freshwater or seawater pearls, because they are all natural “ingredients”.
And now there is a focus on sustainability, with lab-grown gems becoming more popular and affordable. I don’t see why we can’t make more room for synthetic pearls in our fine and demi-fine jewellery pieces.
The difference between lab-grown and synthetic gems is basically that lab-grown gems are real gems, with the same chemical structure as their natural counterparts, but there is more control over how they’re formed so they have fewer imperfections. Whereas synthentics are often made from glass or crystal, cut or shaped to give the appearance of the real thing.
But they still have the look of the real thing, and can still be used in the same ways. And in others that the natural ones cannot, such as being exposed to higher temperatures without so much risk of damage.
Natural, freshwater pearls are very sensitive to heat and chemicals; general care advice is to put on your pearl jewellery after you’ve dried your hair and put on any makeup and perfumes, and make sure they are wiped down and completely dry before you store them in your jewellery box (completely flat, on their own, away from other pieces to avoid scratching). However, it’s also recommended that you wear them everyday, as they benefit from the moisture in the air.
The synthetic pearls I prefer to use are not that “fussy”. You can top-up your makeup and perfume without taking them off, and they aren’t going to get scratched and scuffed if you wear them with other jewellery. You should probably still give them a quick wipe every now and again, though.
Unlike a lot of faux pearls made of paste or resin and so on, they are also made in a way that mimics the formation of a natural pearl: they have a “nucleus” (a lead-free crystal base) and layers of nacre are built up around it until they reach the required size and shape. I’m sometimes tempted to try splitting one open to see what it looks like inside, but I’ve not been brave enough yet. I say ‘brave’, but that’d be one less pearl to string on a necklace or bracelet, and I’m not about to waste good materials here.
But the main reason I love them is all the different shapes and shades they’re available in, without the prices fluctuating so wildly. I still tend to prefer the spherical, cream-coloured ones, though.
Most of my pearl-heavy pieces use gold- or silver-plated base metals, out of habit, more than anything. But I would like to am going to start using precious metals as well. Particularly sterling silver. Such a lovely metal to work with, and very lustrous and reflective; just what pearls of any kind need, really.
I’m picturing a bridal collection, with a bit of colour and sparkle, just right for summer time. I should probably look up how to make those decorative hair-comb thingies. Or at the very least learn the proper name for them.
So I best be off; got a lot of research to be getting on with! I intend to be back soon – perhaps with a new project related to something I may have just been talking about – so be sure to subscribe so you don’t miss future posts. And of course, likes and comments are muchly appreciated.
If you’d like to see more from me, you can find me on Instagram (where you’ll find me most of the time), Twitter, and Facebook, and of course, you cantreat yourself and visit my Shop!
Thanks ever so much for reading my blog. Hope you enjoyed it, and that you have a lovely rest of your day!
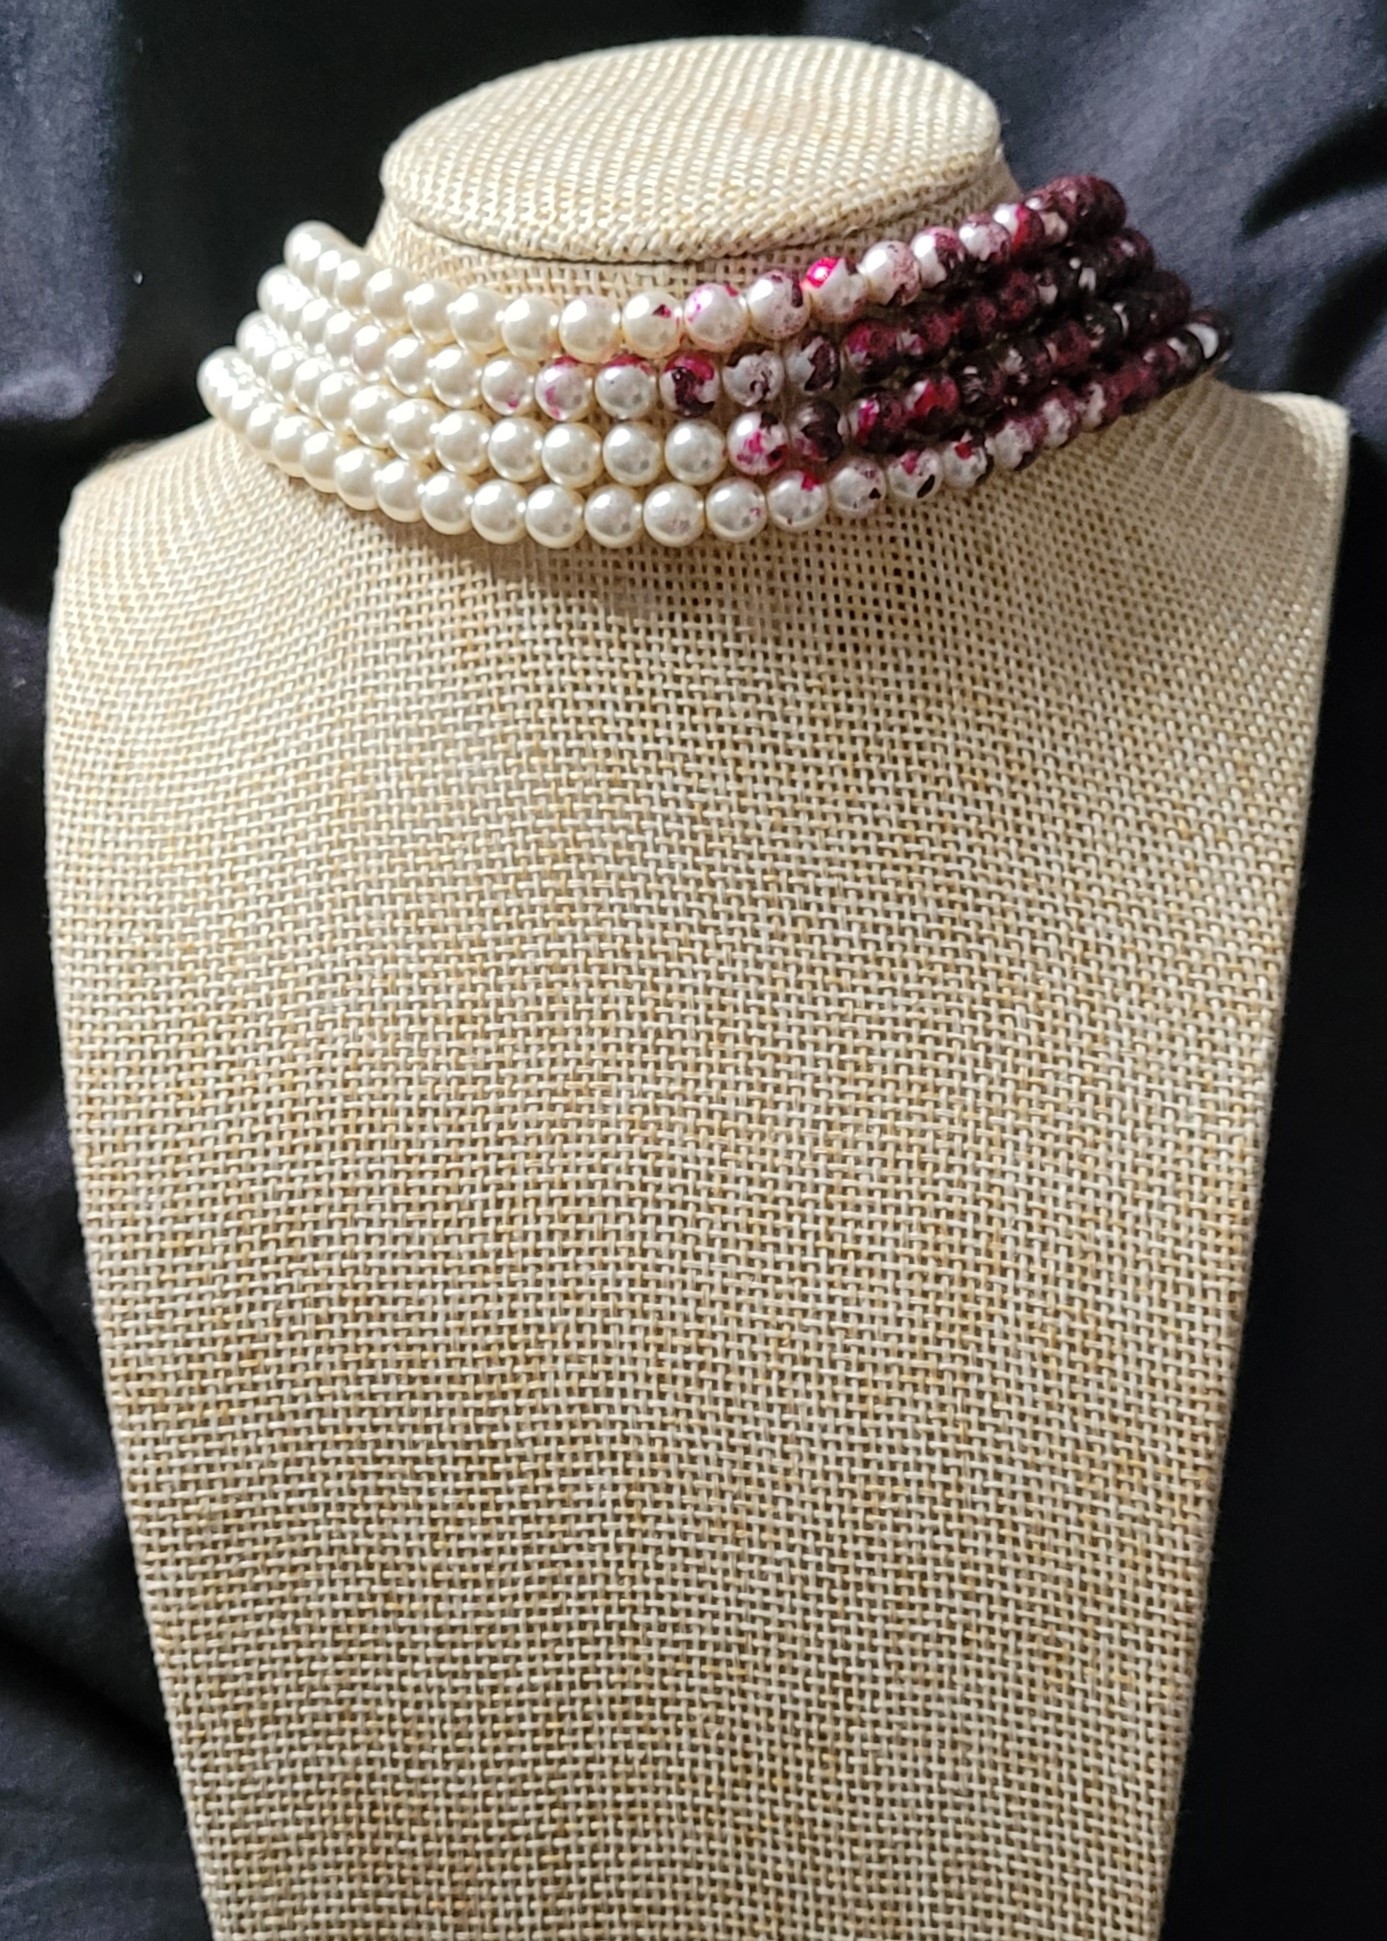
I found my beads! All of them! You know what this means? I was able to finish my project in time! Even though I’ve just spent the past week almost ignoring the choker completely. I still have no plans made, so just as I thought/hoped, I will be sitting about in my PJs, drinking Bloody Marys.
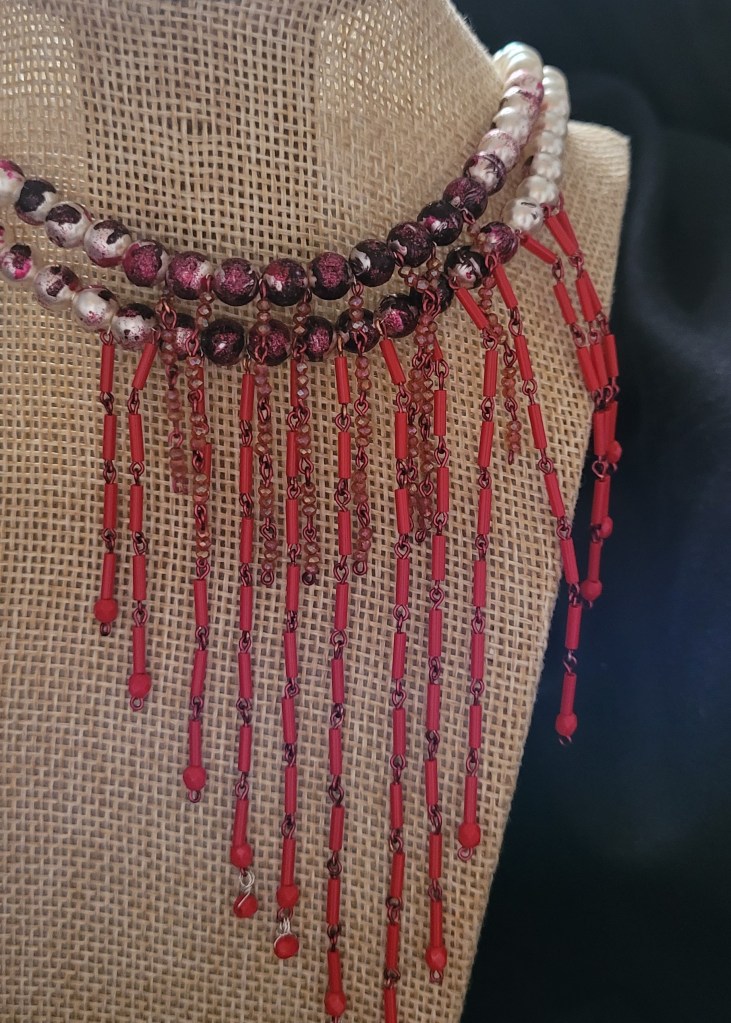
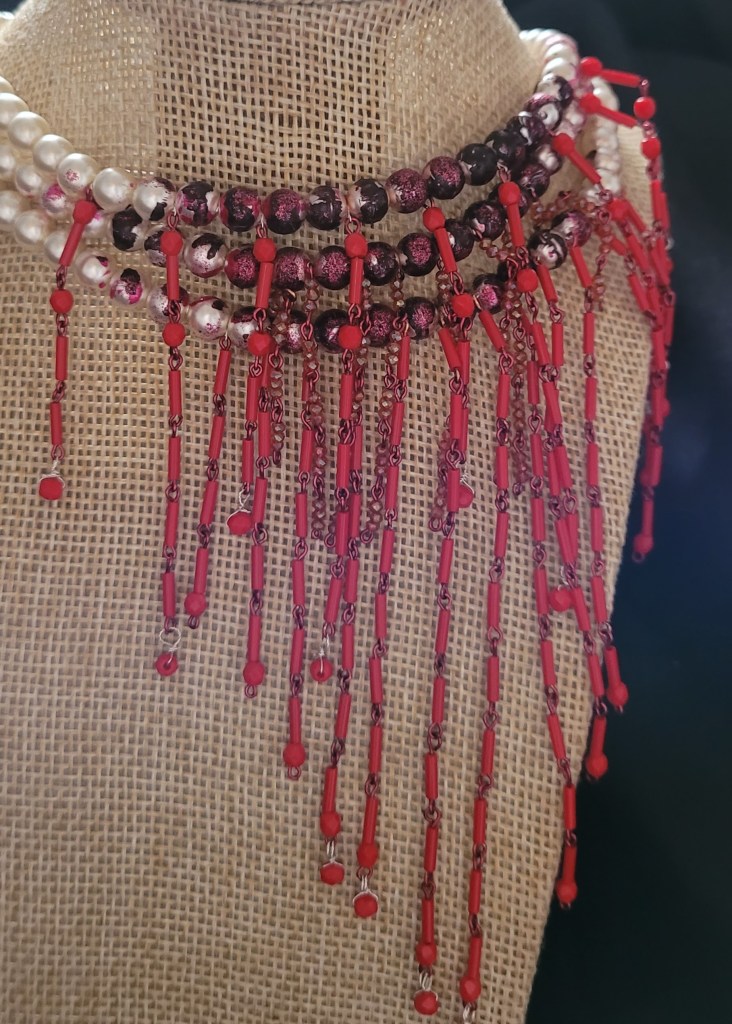
Let’s take a moment to do a quick comparison/before and after/where we started vs. where we are:
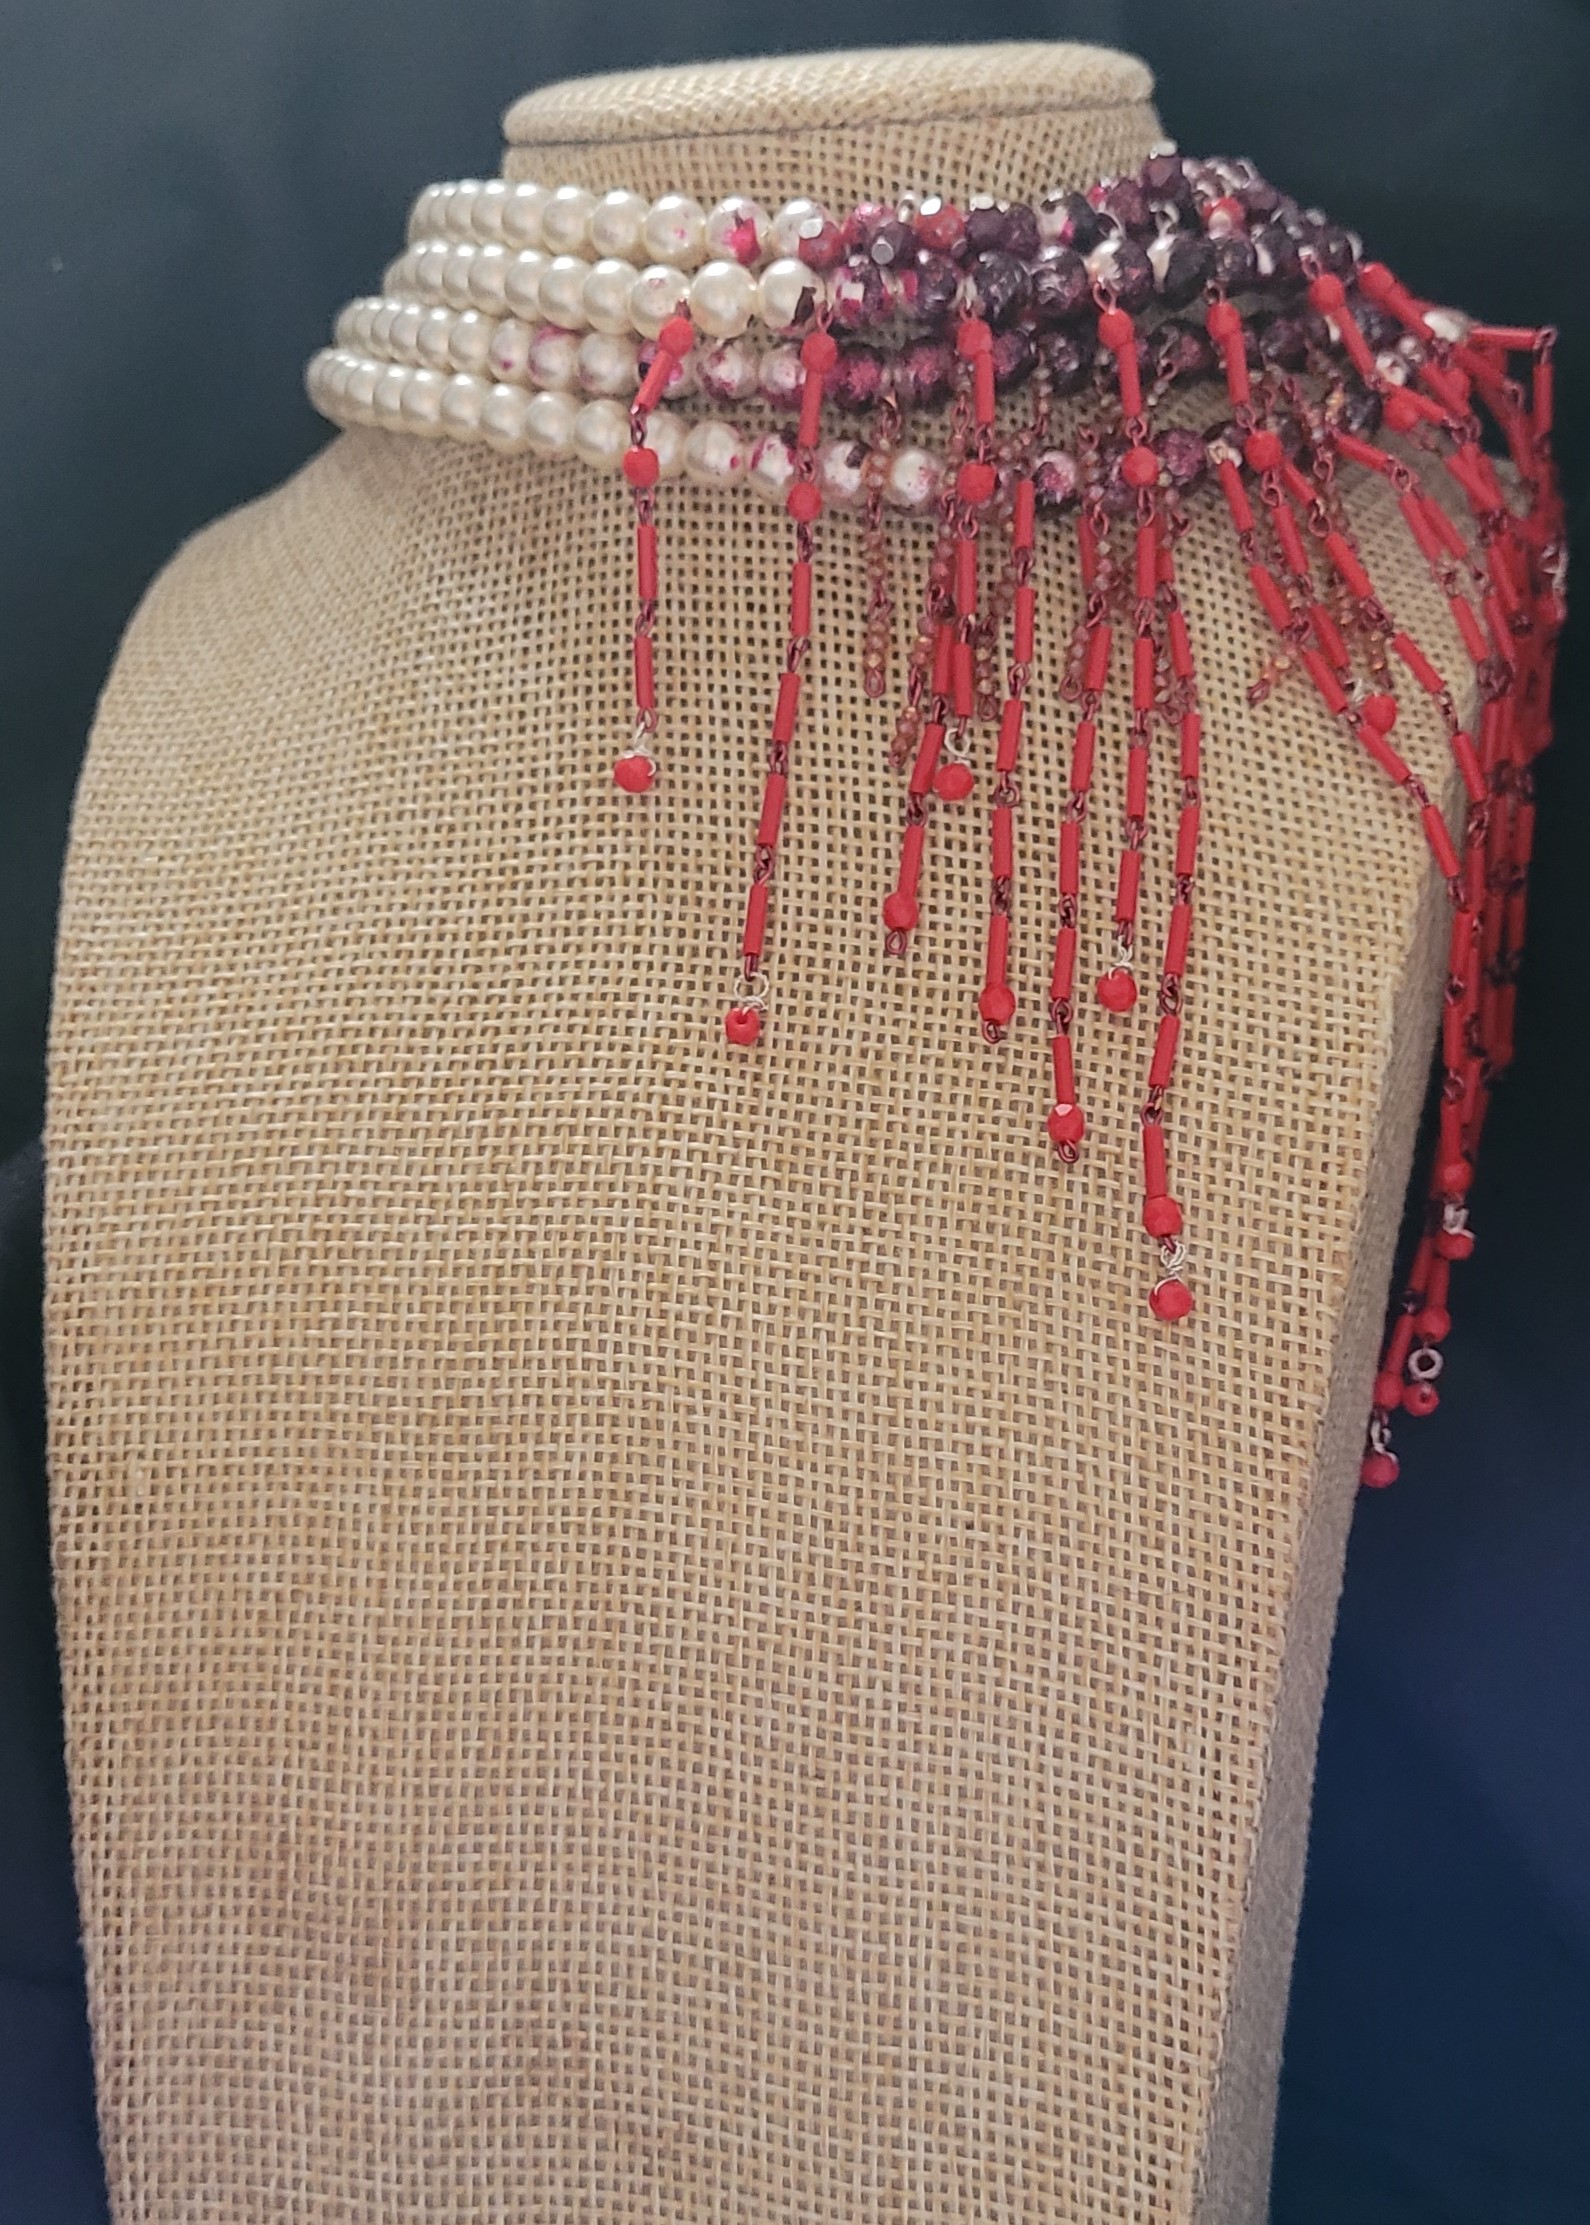
I’m pleased with the result. Getting the “blood drip” embellishments “just so” wasn’t the struggle I anticipated, either. It’s not an exact representation of the image in my head, but that didn’t look all that much like the Hell’s Belle Designs version anyway. However, it flows and moves just how I wanted it to. It feels so light too. So that is a big plus.
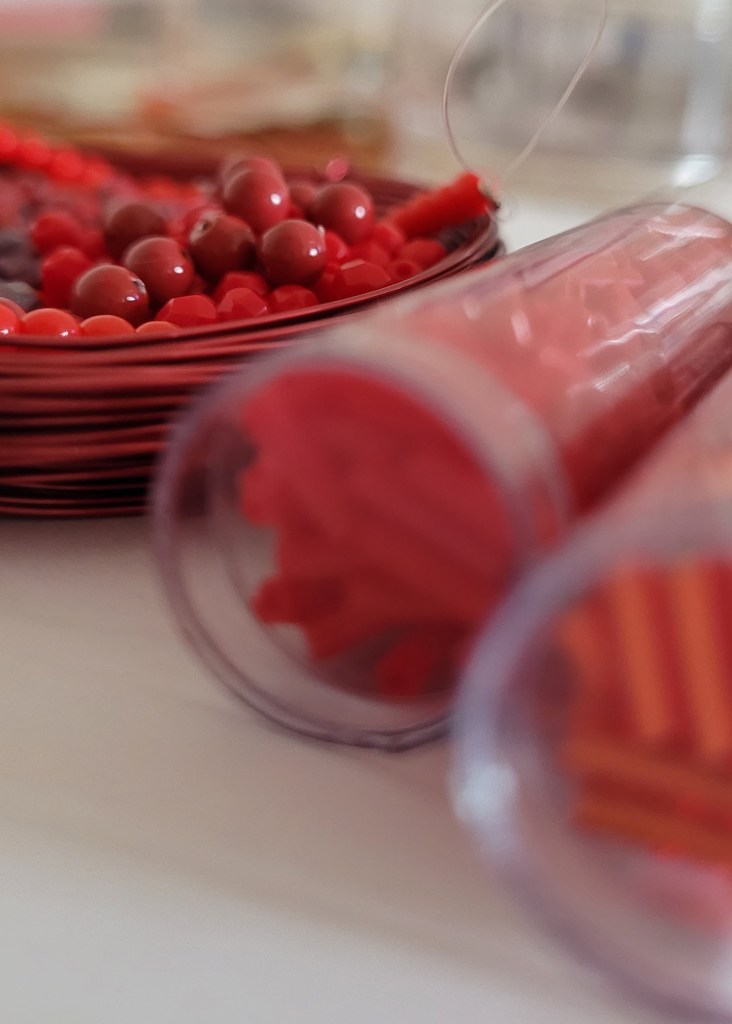
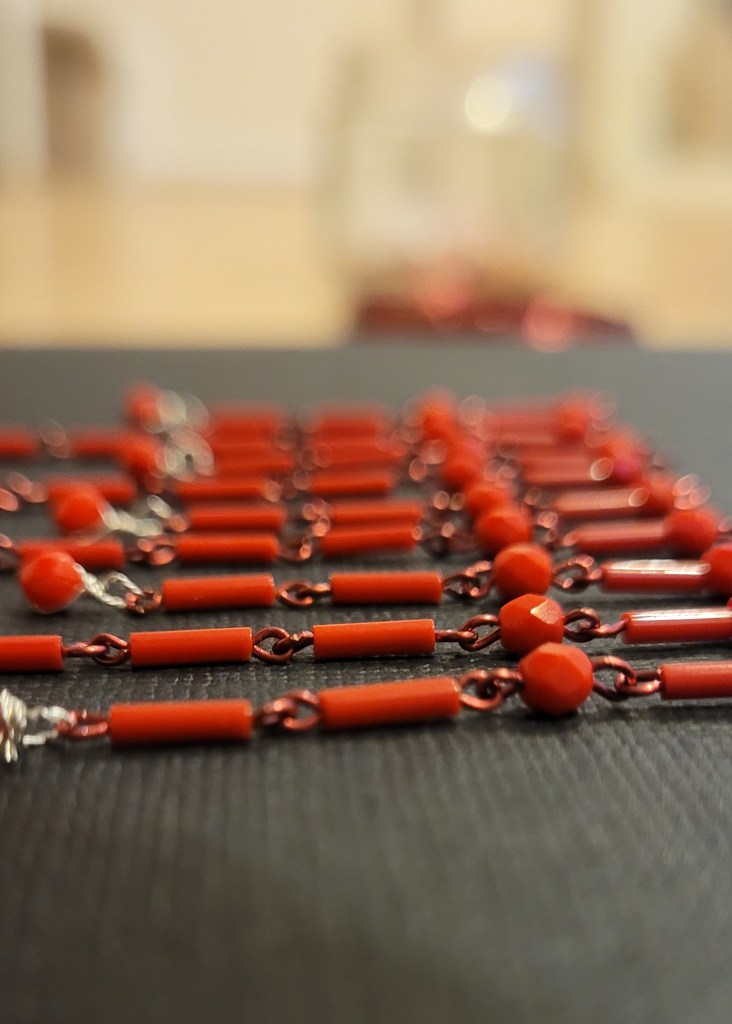
Even so, I’m not really in the mood to give any kind of retelling of the process. But, it’s said that a picture is worth 1,000 words, so here, I’ll give you 7,000:
Not being in the mood to tell you about the process of completing my choker doesn’t mean I’m not in the mood to write (well, type, really). So, considering the date, it seems only fitting that I should tell you another story about a paranormal experience I have… um, experienced. And again, just like in Part 2 of this series, it is unrelated to this choker project, or any kind of jewellery making. If you want to skip the story, just scroll down to where the non-italicised text starts up again.
I don’t know whether it’s that I’ve decided for myself whether this is a pattern, and I’ve been unconsciously selecting these memories and sorting them into a group of sorts, or whether the majority of the “out of the ordinary” things I have encountered really are only seeing peoples’ doubles, but if I do notice anything OOTO, the theme does appear to be doppelgängers.
Not just “I met someone who looked exactly like X person I know”, but it’s more along the lines of, “did time just displace me for a moment?” I’ve seen what I thought was my brother running out of the room, when he was in fact still sitting in the same place across the room, behind me; I’ve seen two – possibly just very similarly dressed – old men walk past me in opposite directions. But the weirdest one was about 3 years ago now, at this time of year. Almost to the date, actually. It was 28 October, 2018. A Sunday.Like today.
I had taken my dog for a walk that morning, and we had spent a good half an hour getting cold, tired, and muddy playing fetch on the field at the local recreation ground. But now it was time to go. So I put him back on his lead and we started walking down the path, past the kids’ playground area and the basketball court.
It was 10:00 am, as I could hear the church bells chiming the hour, and there were suddenly a lot of people about, coming from the morning’s mass… sermon? Must be sermon, as none of the christian churches in the area are catholic churches.
My dog loves people, so usually he would be delighted that we were no longer on our own, but he didn’t really seem to be taking that much notice. He was probably shattered, to be fair. I wasn’t taking much notice either, until I heard a very young baby crying.
Well, I thought it was a young baby. Until I’d got a bit closer and noticed it was a little girl, who looked like she was about 2 years old. Maybe 18 months – very young, but not newborn young – wearing a bright multicolour romper suit/onesie thing, with her mom, wearing a really nice mustard yellow cardi. The little girl was definitely the only child around as far as I can remember, and it was her cries I’d heard.
We passed the child and her mom, them heading in the opposite direction to us, and I remember her crying stopped for a moment after she and my dog made eye contact. She pointed the “doggy!” out to her mom, and my dog slowed down a bit, like he wanted to follow them. He loves attention more than he loves the people giving it.
I quickly got him to come back to the idea of coming back to our house, and we were soon out of the recreation ground, across the road and about to head around the corner near this storybook-looking cottage, all in the space of about 2 minutes.
My dog stops to sniff around a tree, and then I hear it again. The crying. And again, it’s coming from ahead of us, around the corner.
This has to be a newborn baby, right?
Wrong.
Coming around the corner was the same little girl, and the same mom. Same brightly patterned onesie. Same yellow cardigan. Um. How?
Again, my dog stops what he’s doing, and the little girl stops crying to point out the “doggy!” to her mom and comes over to him. I say to the mom something like, “He’s a bit muddy, is that okay?” and she nods, smiling. But that was nothing like what I wanted to say. What I wanted to say was, “IhavejustseenyoutwoattheRec! How are you here already?!!!” They had been walking in the opposite direction to us. Even if they had turned around and left the recreation ground where I did with my dog, they couldn’t have been ahead of us and coming back around the corner.
I don’t know whether the little girl recognised my dog as the one she’d seen only a few minutes ago when we walked past each other, and maybe that was why she wanted to come over to him, but I was the only one who seemed freaked out by the situation. She didn’t want to give him a fuss or anything; just to stand near him. It was quite cute, to be fair. And he seemed happy enough with that, too.
The girl and her mom eventually carried on, heading in the direction of the recreation ground. I carried on walking back with the dog, quicker than before; could not wait to get home.
I didn’t look back at all, but about when the girl and her mom would have been crossing the road, I realised that I could hear the girl begin to cry again.
So, yeah. Three years later, I still don’t know what all that was about. I don’t even know how an explanation – reasonable, logical, or otherwise – would really help at this point.
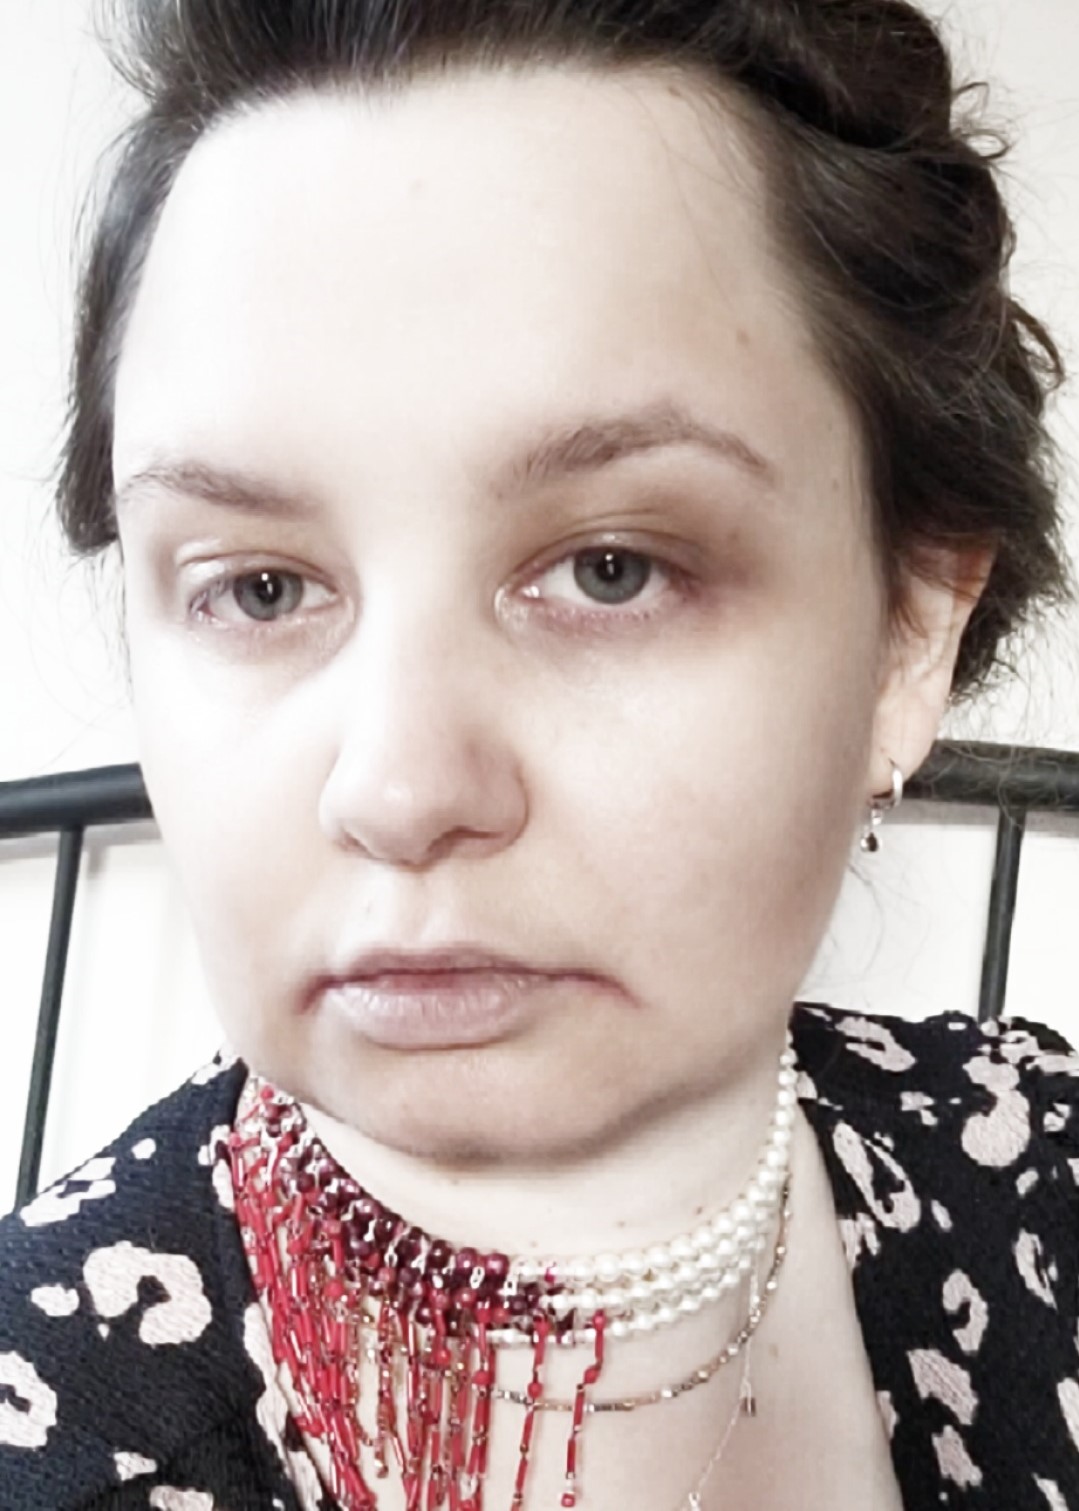
Anyway, back to the present day, and my gorgeous new choker, and have pretty much been wearing it since I got dressed this morning. My kid tells me I look like a dead person from the 1940s. I hope that means it looks like I’m wearing a costume! I quite like it. For today only, obviously. Made sure I looked a bit more alive when we popped out to the shops, though.
Overall, I had fun making this, and would definitely do it again. And, funnily enough, I might be doing something like that sooner than I thought!
I posted a few pics to my Instagram Stories yesterday night, and this morning I got a message which has set a whole new load of ideas firing off around my head:
I’m a big fan of the ‘C’ Word!
I’m really liking this. I was wondering what my next project should be, now that I’m done with this one. I’m picturing something like snow falling, or stars. Or both!
That’s all for now. Nothing left to do but leave you with a few questions and thank you for popping in and having a read:
Do you think a Christmassy version of this choker would be good? I don’t suppose you’d rather I made it for you next time? Reason I ask is, I can already see my house getting choked up with seasonally themed chokers.
This project is finished, but I’ll be back with a new one very soon, so be sure to subscribe so you don’t miss future posts. And of course, likes and comments are muchly appreciated.
If you’d like to see more from me, you can find me on Instagram (where you’ll find me most of the time), Twitter, and Facebook, and of course, you cantreat yourself and visit my Shop!
Thanks ever so much for reading my blog. Hope you enjoyed it, and that you have a lovely rest of your day!